Over the years a number of people have asked me how I made this Phillips Hue art installation that was displayed for several years on Main St in downtown Durham.
This post is not meant to be a step-by-step tutorial. Still, it should (hopefully) point you in the right direction if you’re interested in controlling and animating multiple Hue LED bulbs using a Raspberry Pi like I did.
Let’s get started!
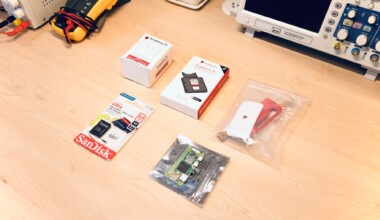
🛒 Shopping List
Parts Needed for Sign
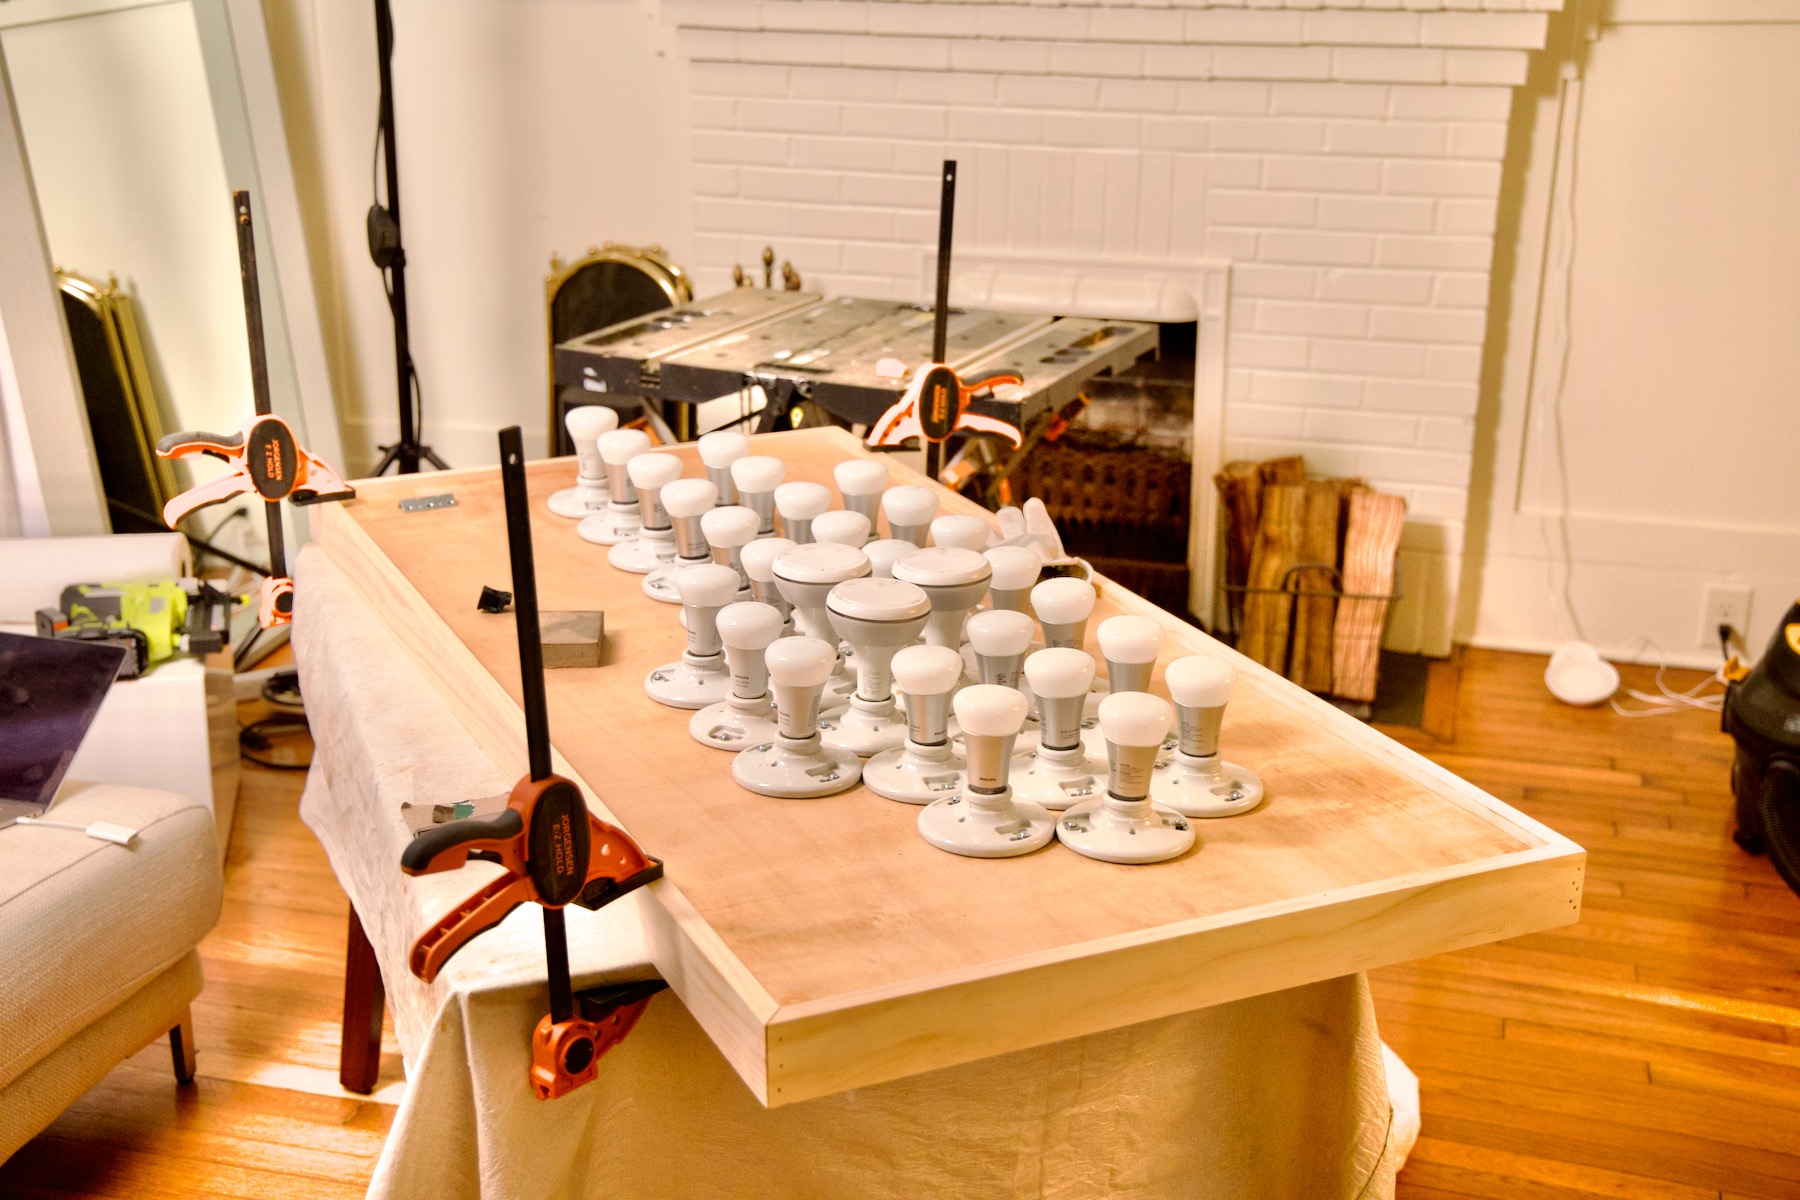
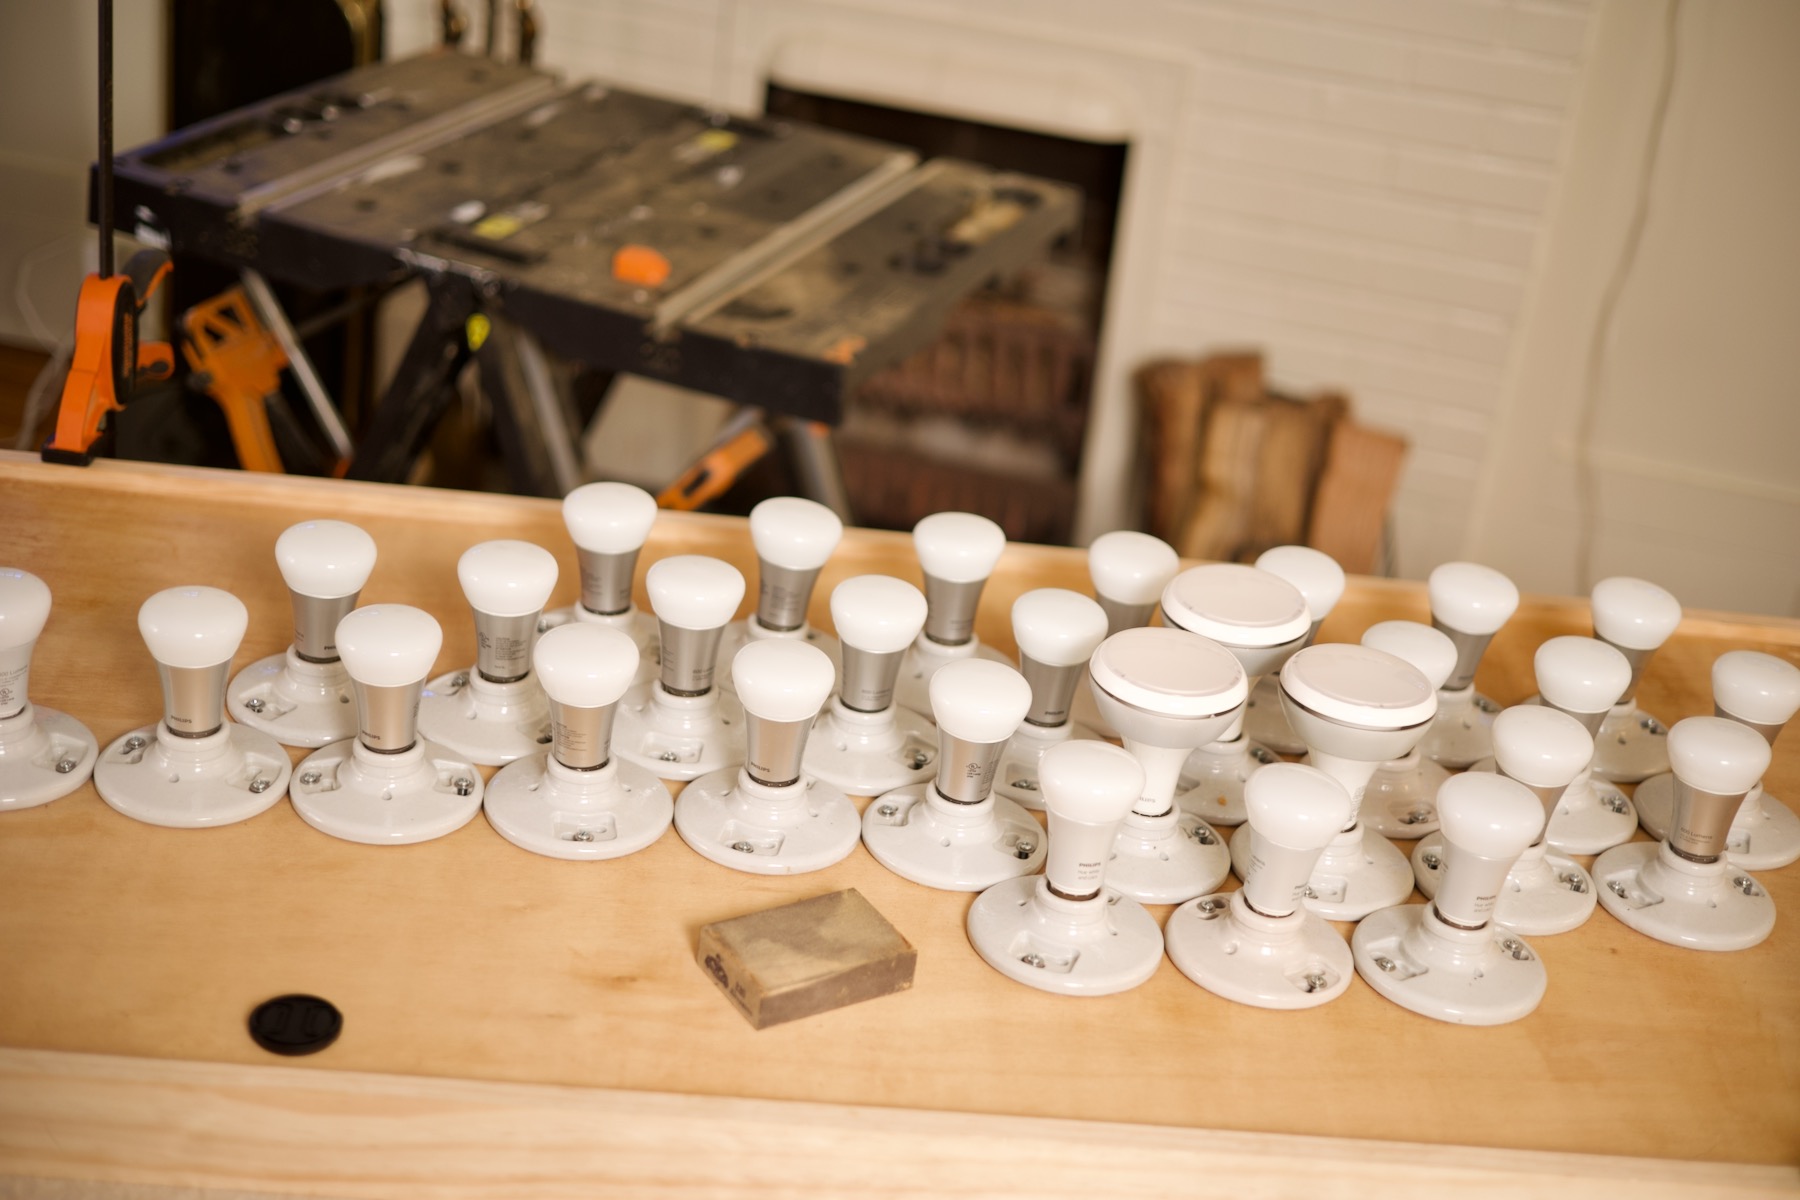
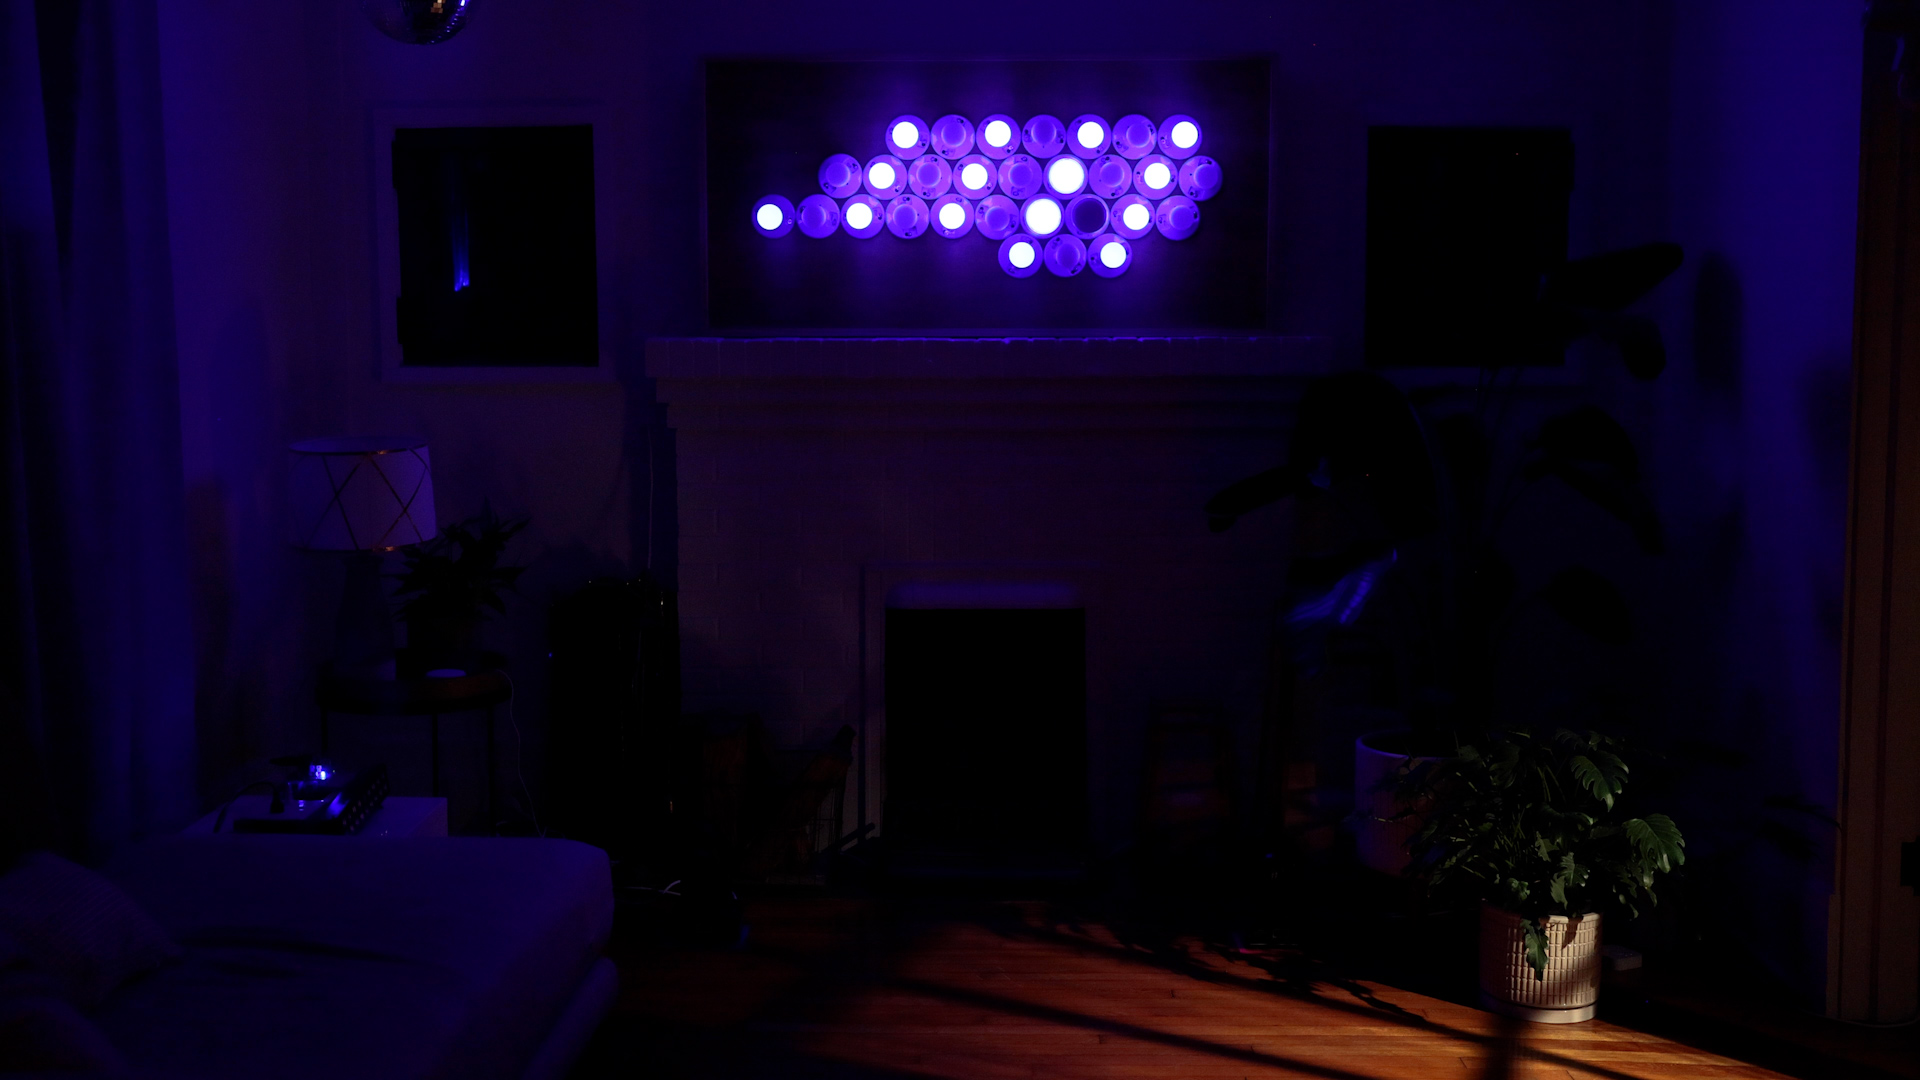
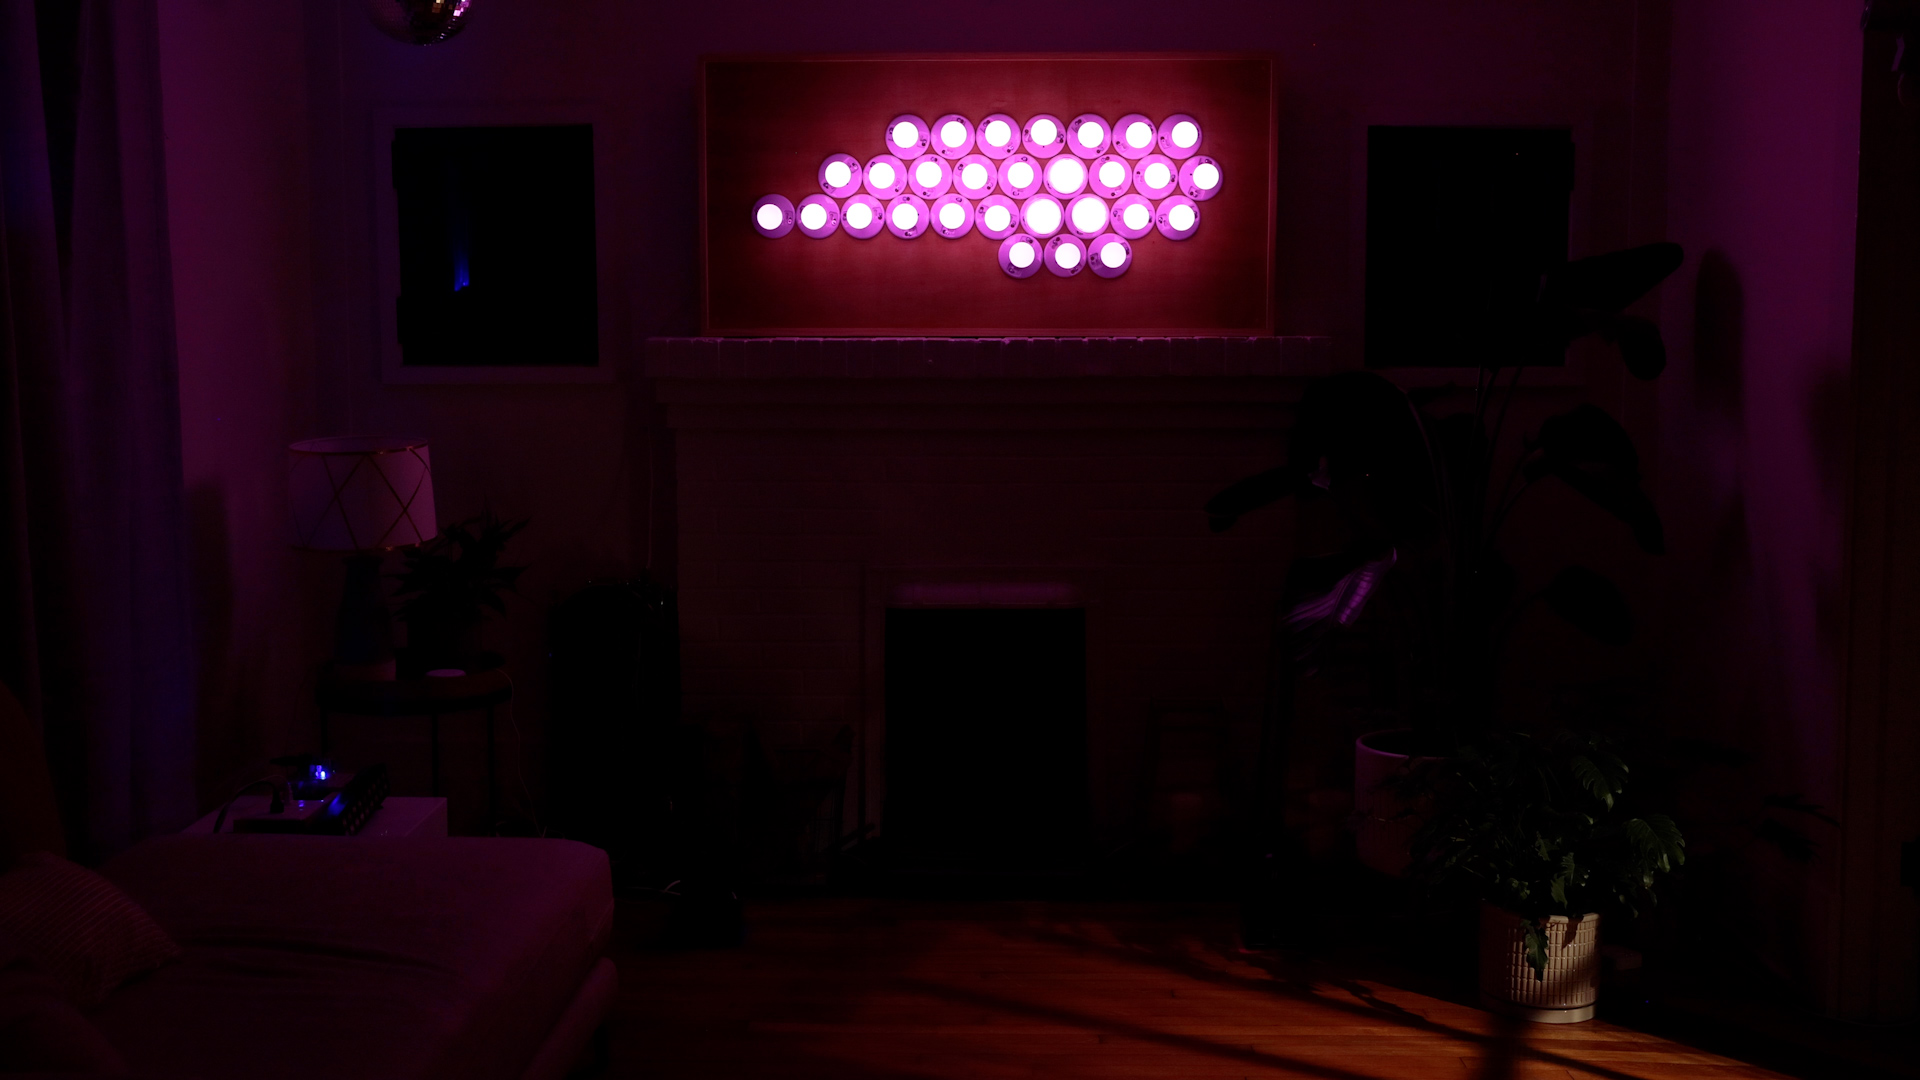
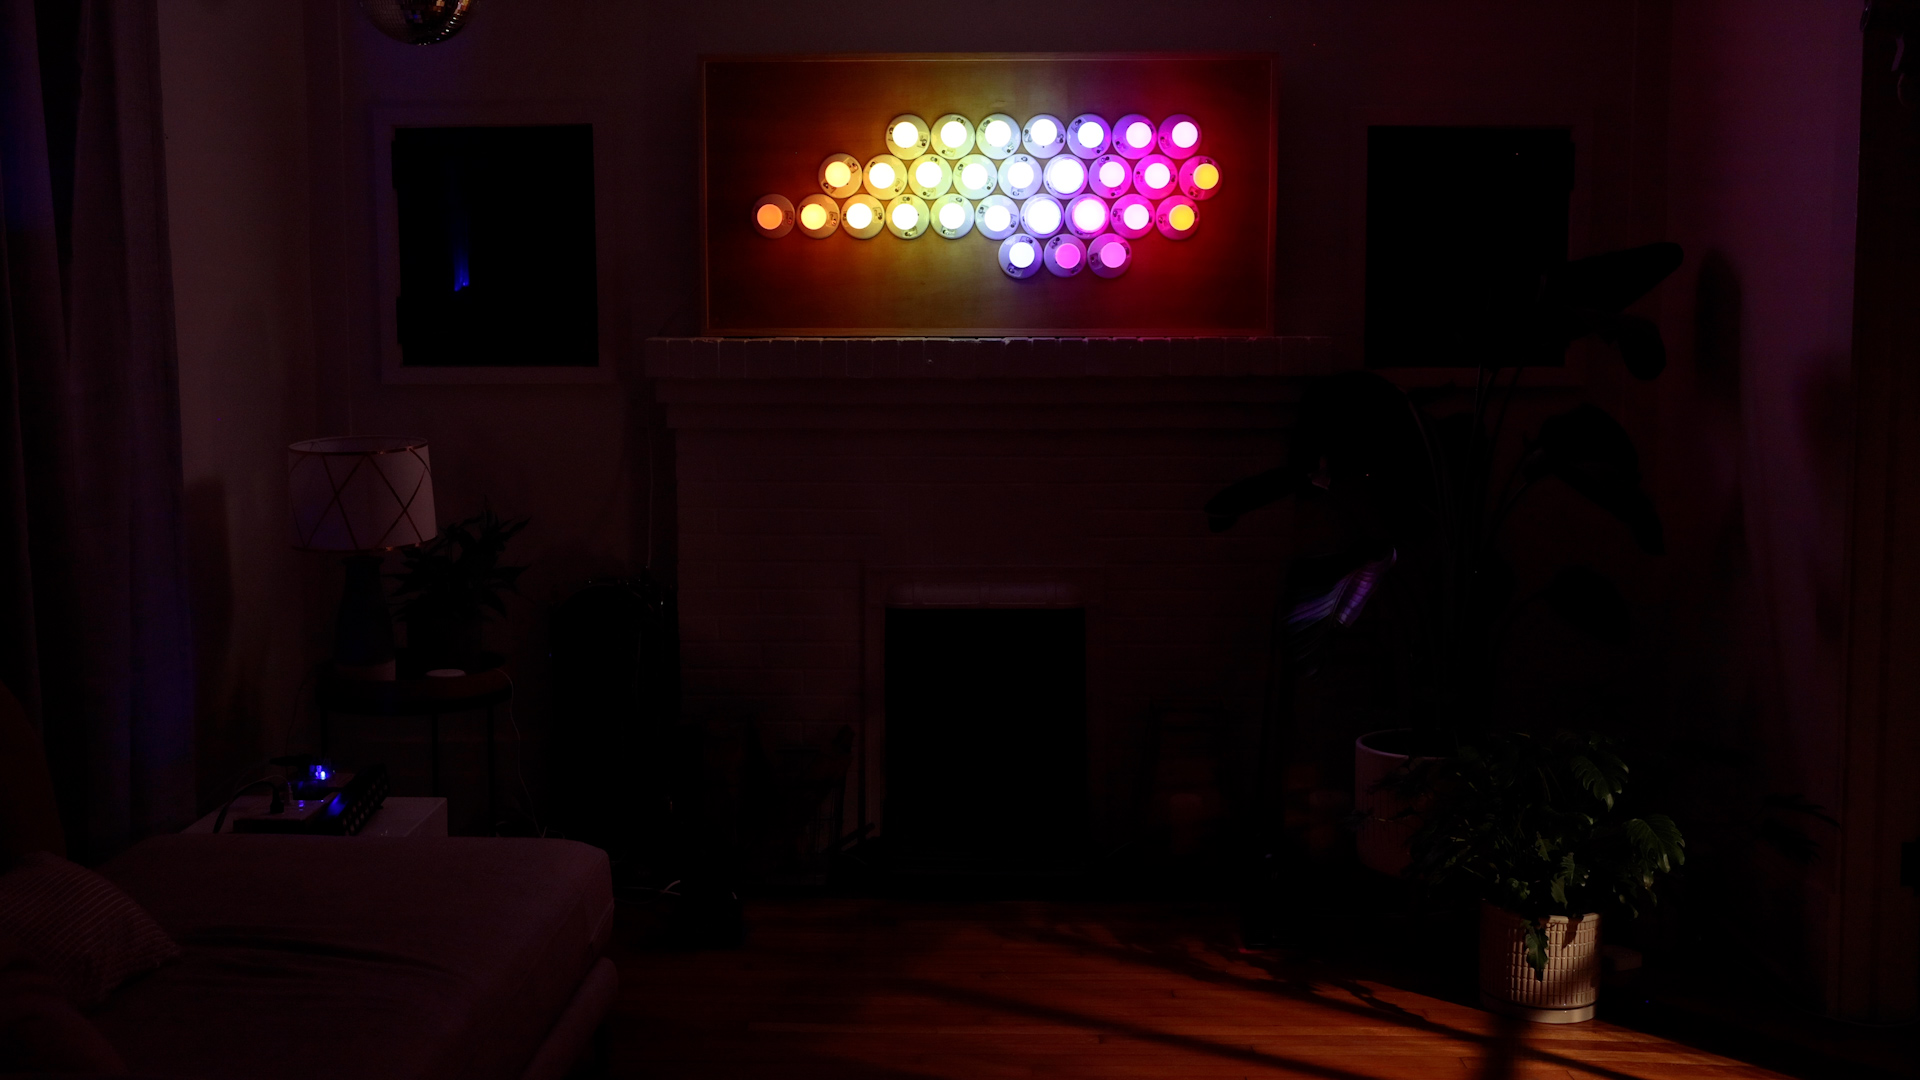
My vision was to make an animated billboard out of Phillips Hue LED smart bulbs all in the shape of North Carolina. You can make your own in whatever shape you choose!


(I’d recommend looking for second-hand Hue bulbs to save $$)

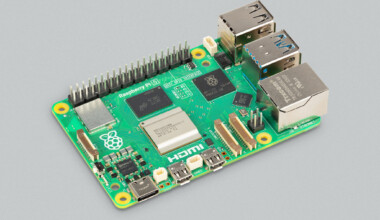
Parts Needed for Controller


I made this back in 2015 using a Raspberry Pi 2. I’d recommend using a Raspberry Pi 3b+ or Raspberry Pi 4.
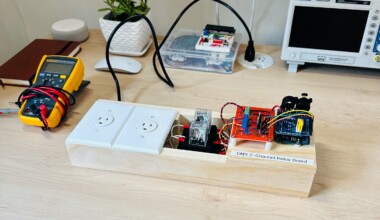
💡 Wiring the Lamp Sockets
All of the lamp sockets should be connected in parallel so that each receives mains voltage (120V). You’ll also want to make a power cord terminated with a standard 120V plug for plugging in to the wall.
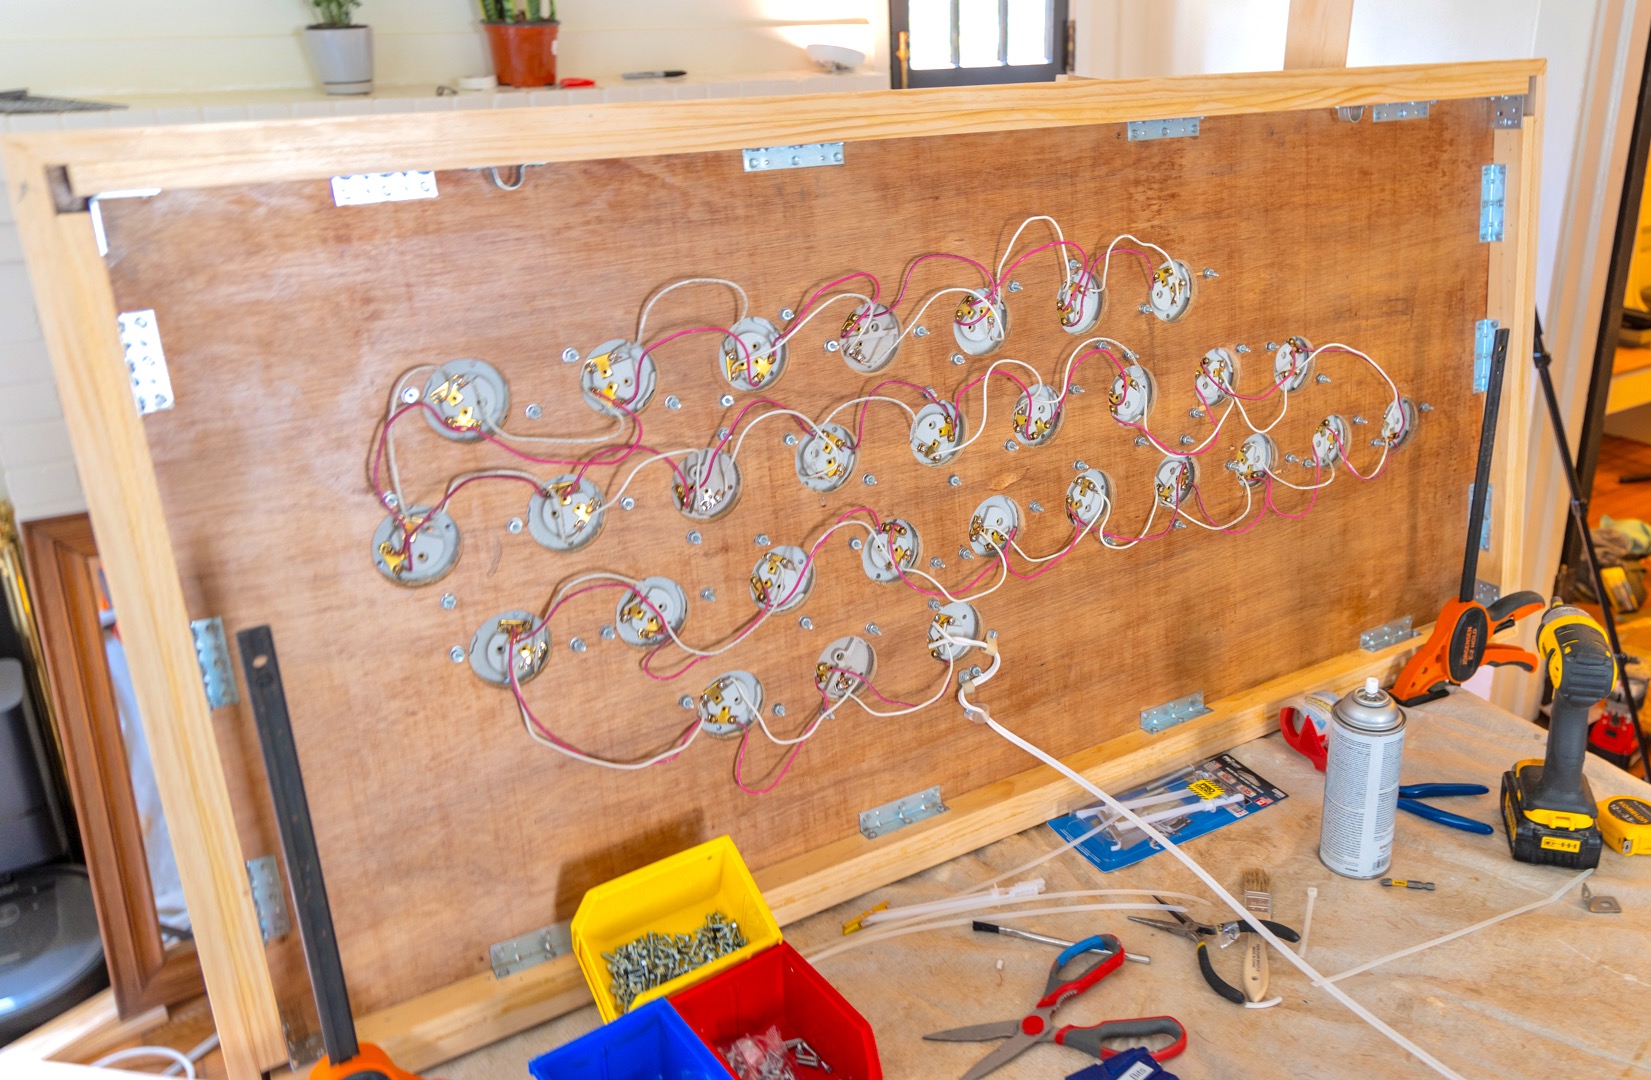
I sanded everything, stained it, and put on a few coats of polyurethane:
🔌 Testing the Wiring
Verify that the wiring is correct by plugging in the sign and making sure all of the Hue bulbs turn on.
The bulbs should turn on and stay white since we haven’t set up the Hue bridge or the Raspberry Pi controller yet.
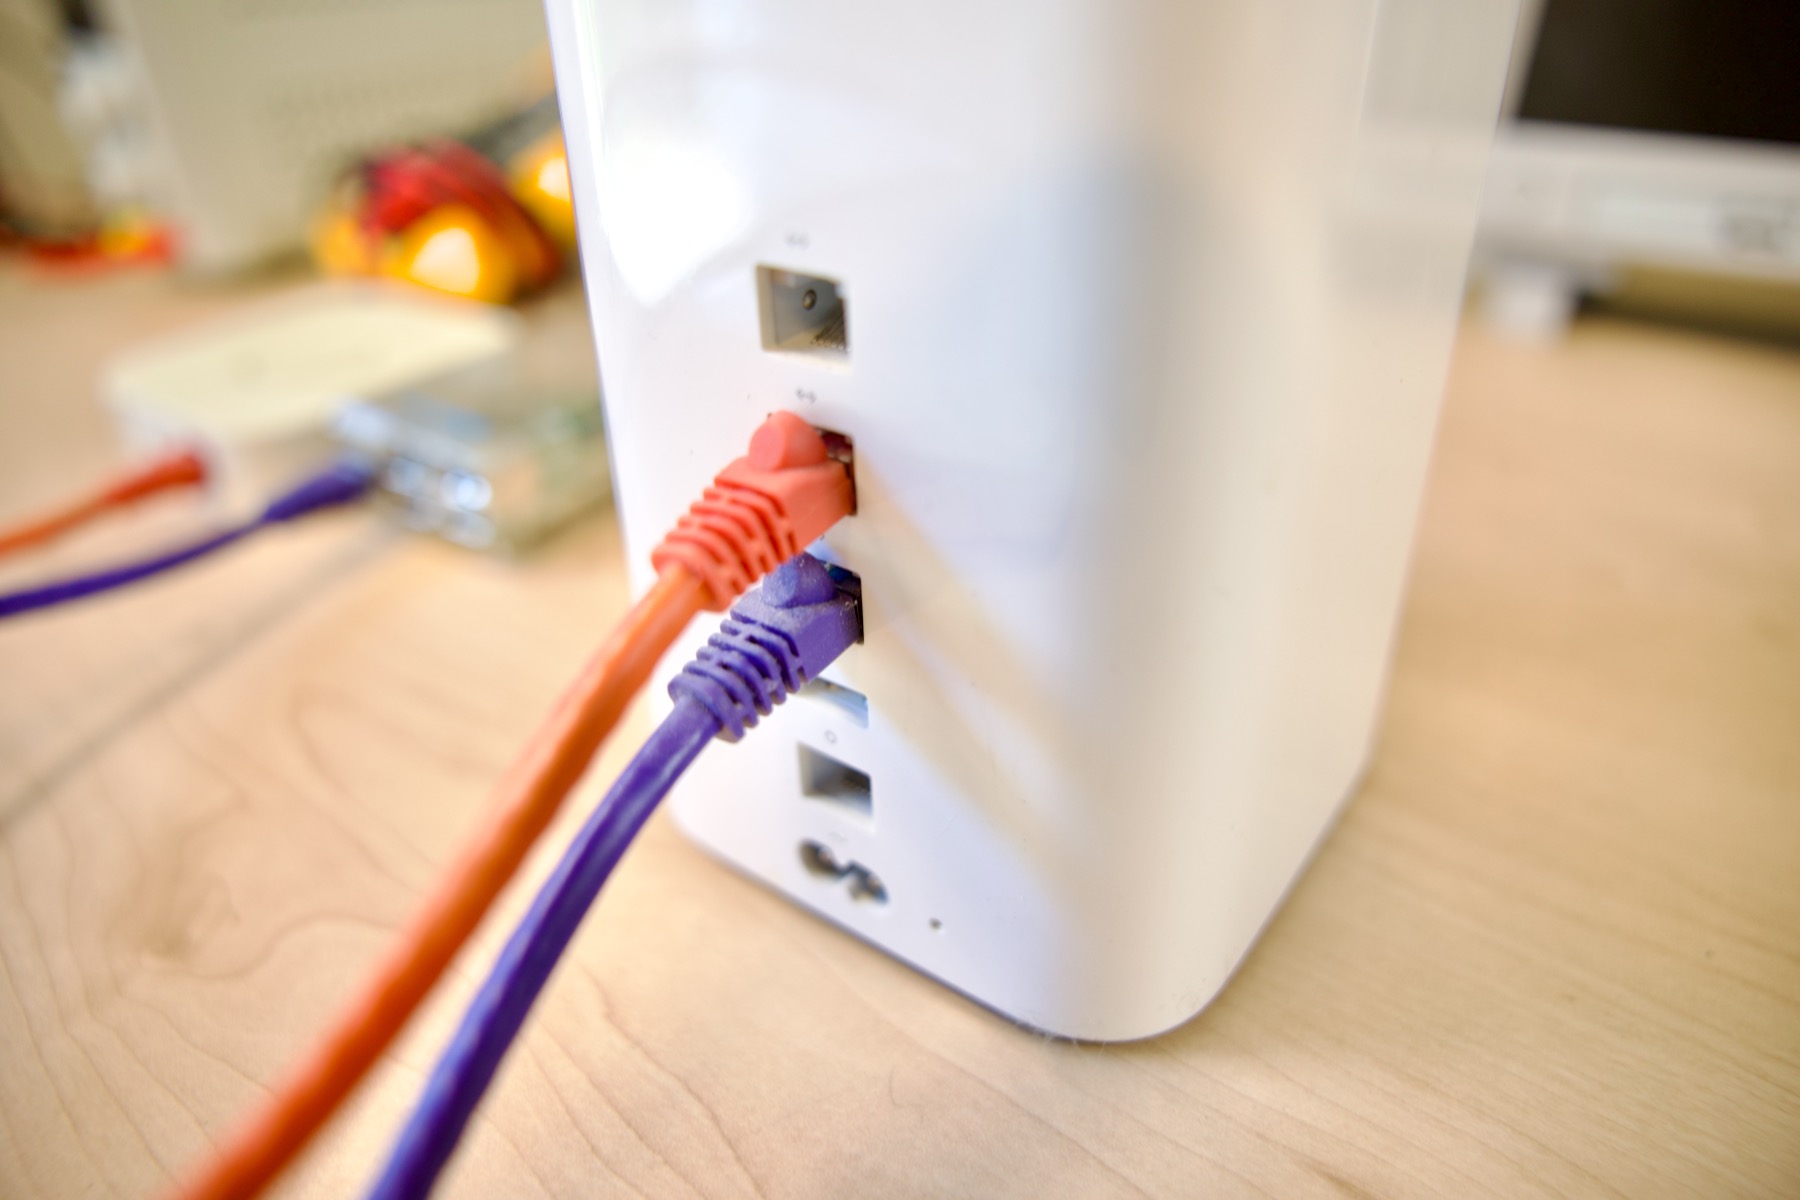
👾 Setting Up the Hue Bridge and Raspberry Pi
Hue bulbs are traditionally controlled via Zigbee, a wireless mesh networking standard. A Hue bridge is needed because devices like your computer or mobile phone do not support the Zigbee protocol. The Hue Bridge “bridges” this gap.
There are two options for setting up a network where the Hue Bridge and the Raspberry PI can talk to one another.
First, I’ll explain how I had to set everything up when I originally put in this installation.
Then, I’ll share an alternate way that may be simpler and less expensive but requires physical access to your home/office WiFi router.
Option 1 – Set Up a LAN From Scratch
You can skip to Option 2 if all three of these are true:
- There is good, reliable WiFi where you want to operate your art installation
- You have physical access to the WiFi router
- There is at least one available ethernet port on the router for plugging in the Hue bridge
- The Hue bulbs are not too far away from the location of the bridge (which is plugged into the router)
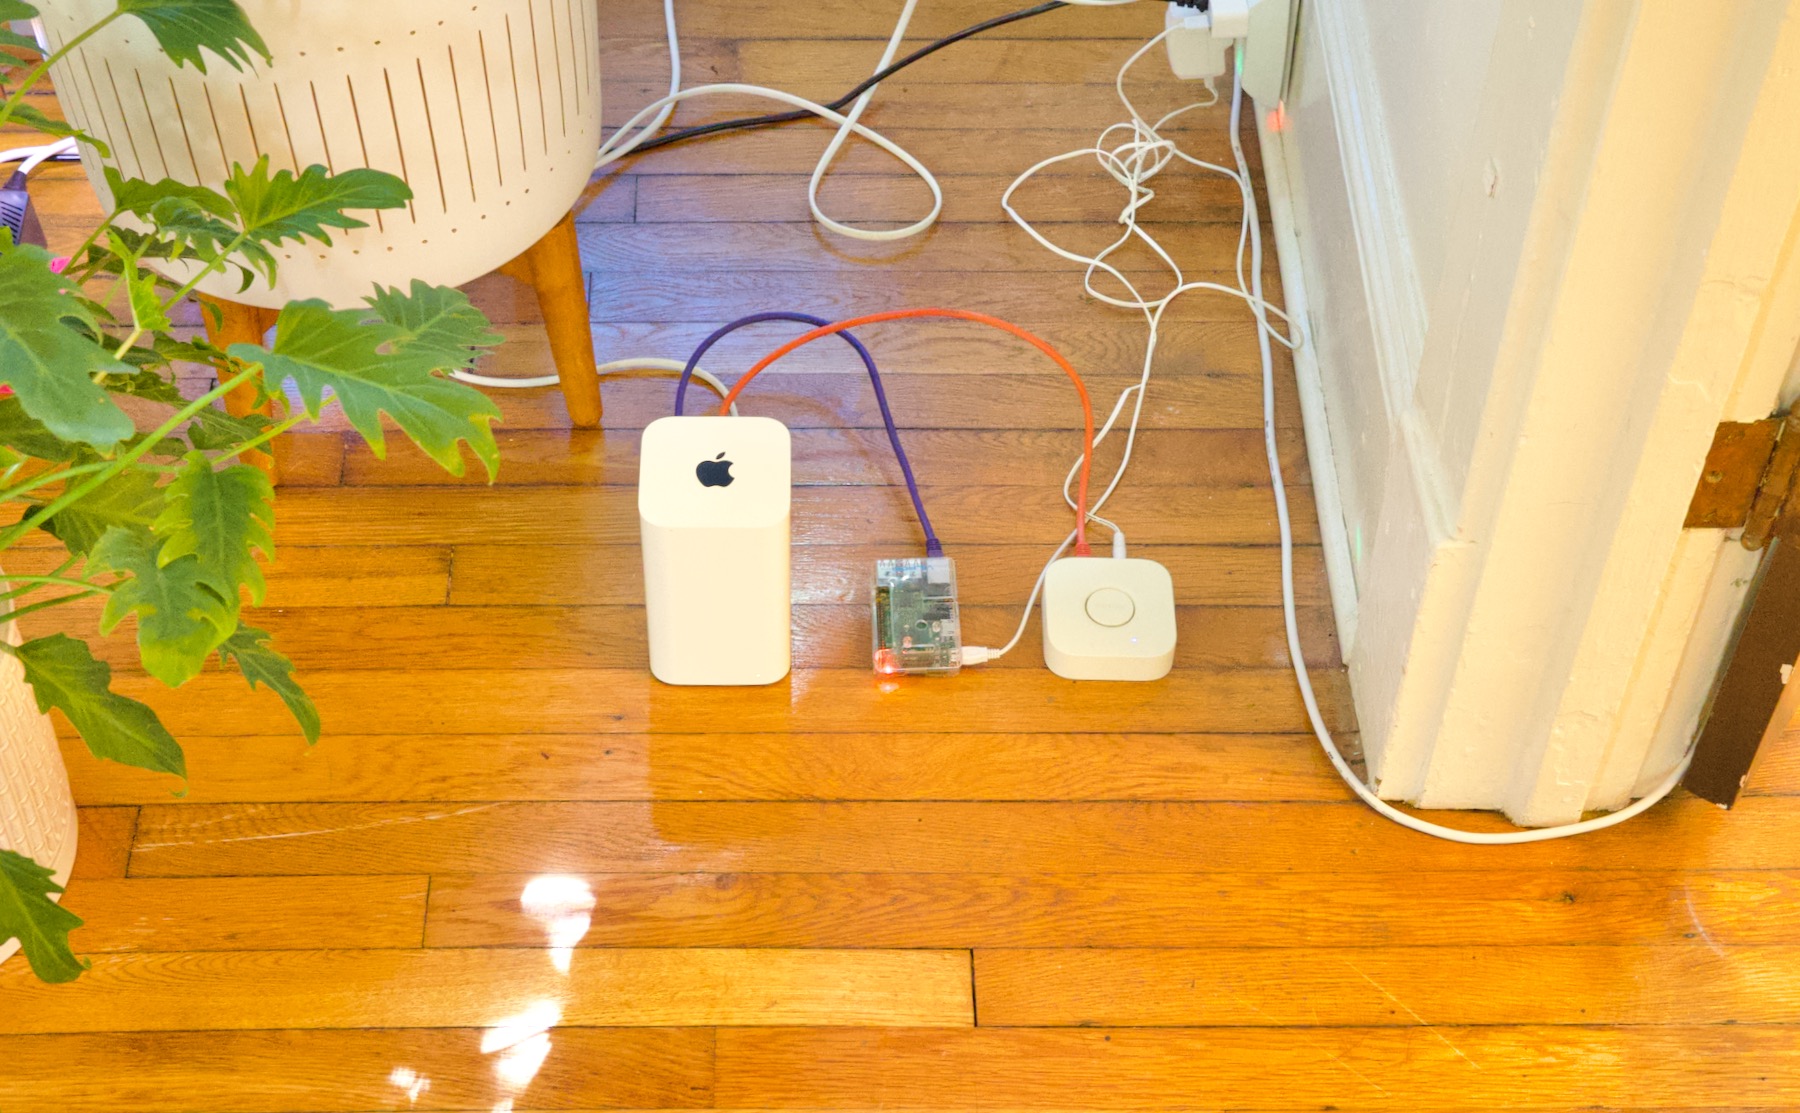
When I designed this sign, I wanted it to be completely self-contained so I could relocate it easily and not depend on some WiFi network I didn’t control.
Why is this important?
This project requires that the Hue bridge and Raspberry Pi are on the same local network (wireless or wired). This means I need my own router (a DHCP server) to enable communications between the Pi and the bridge.
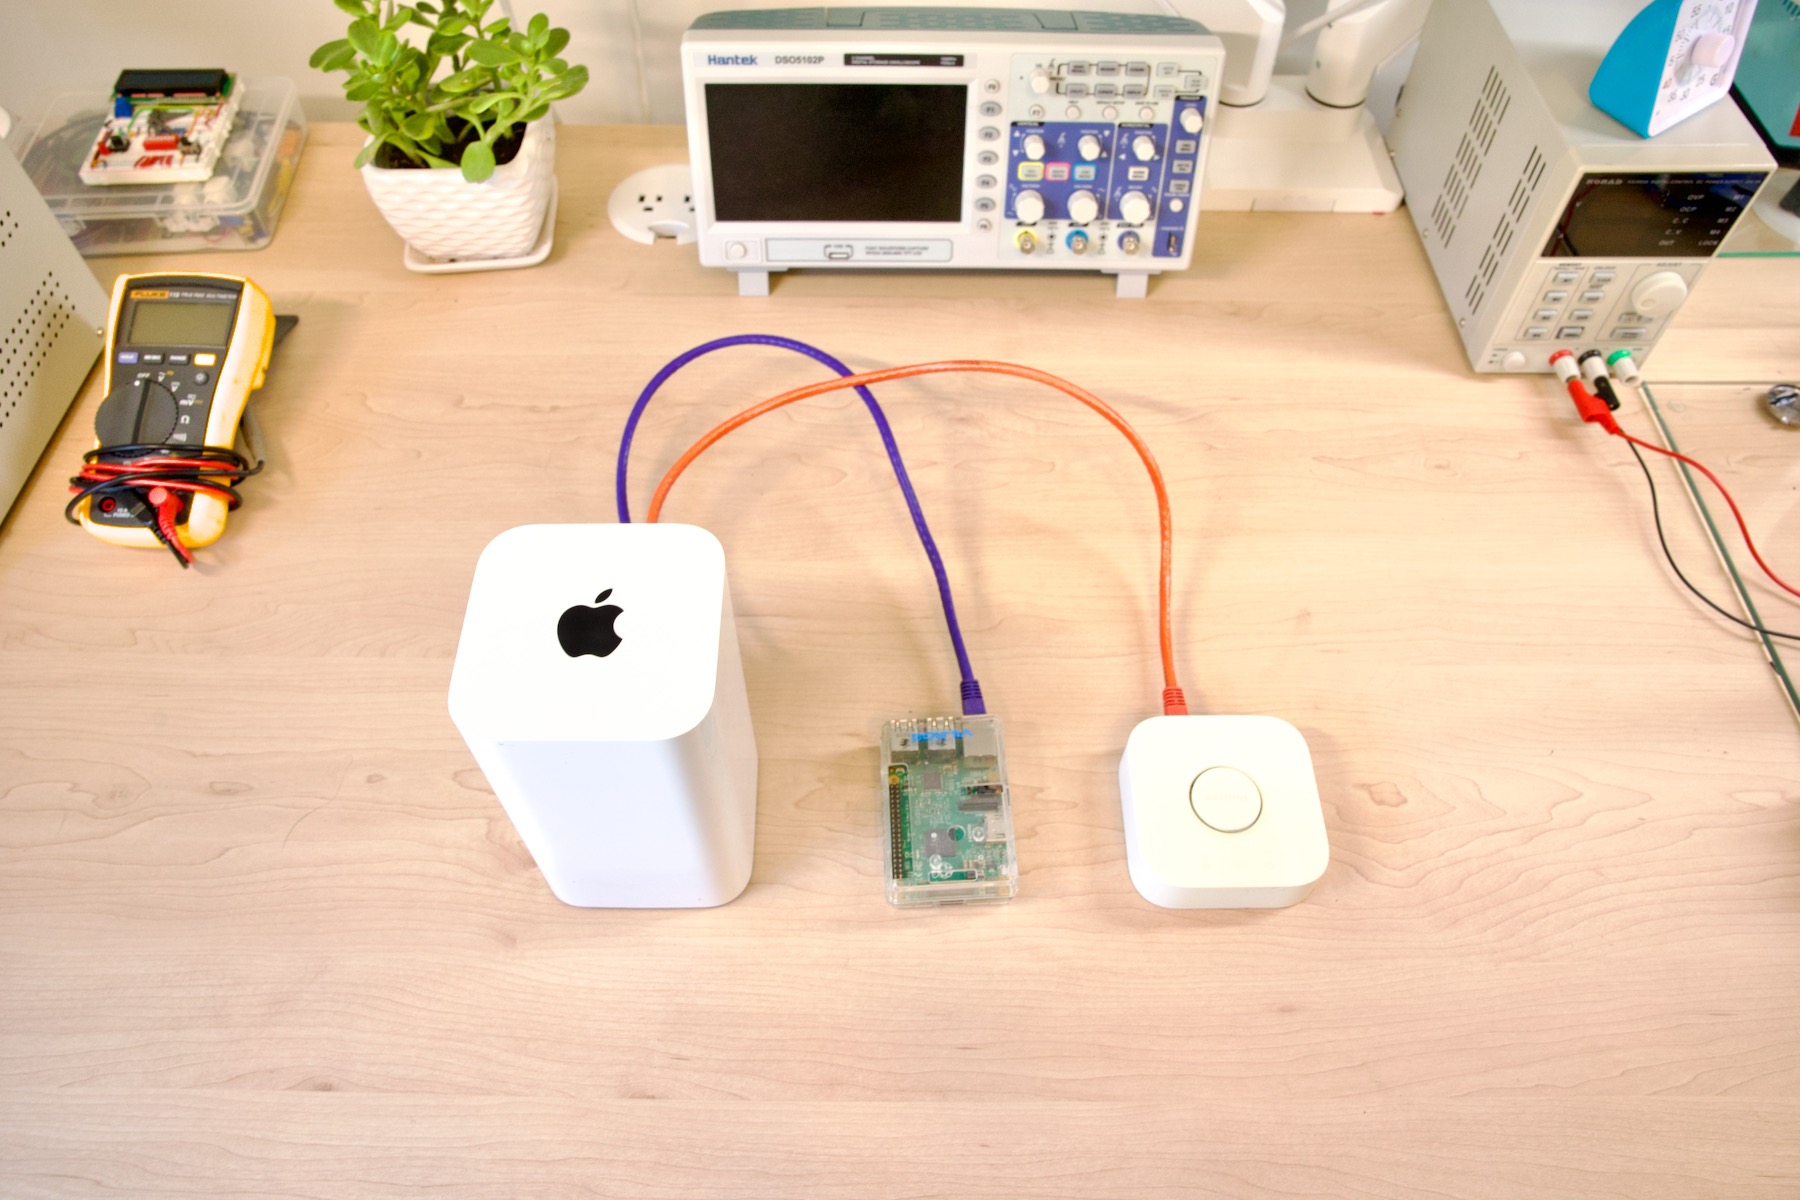
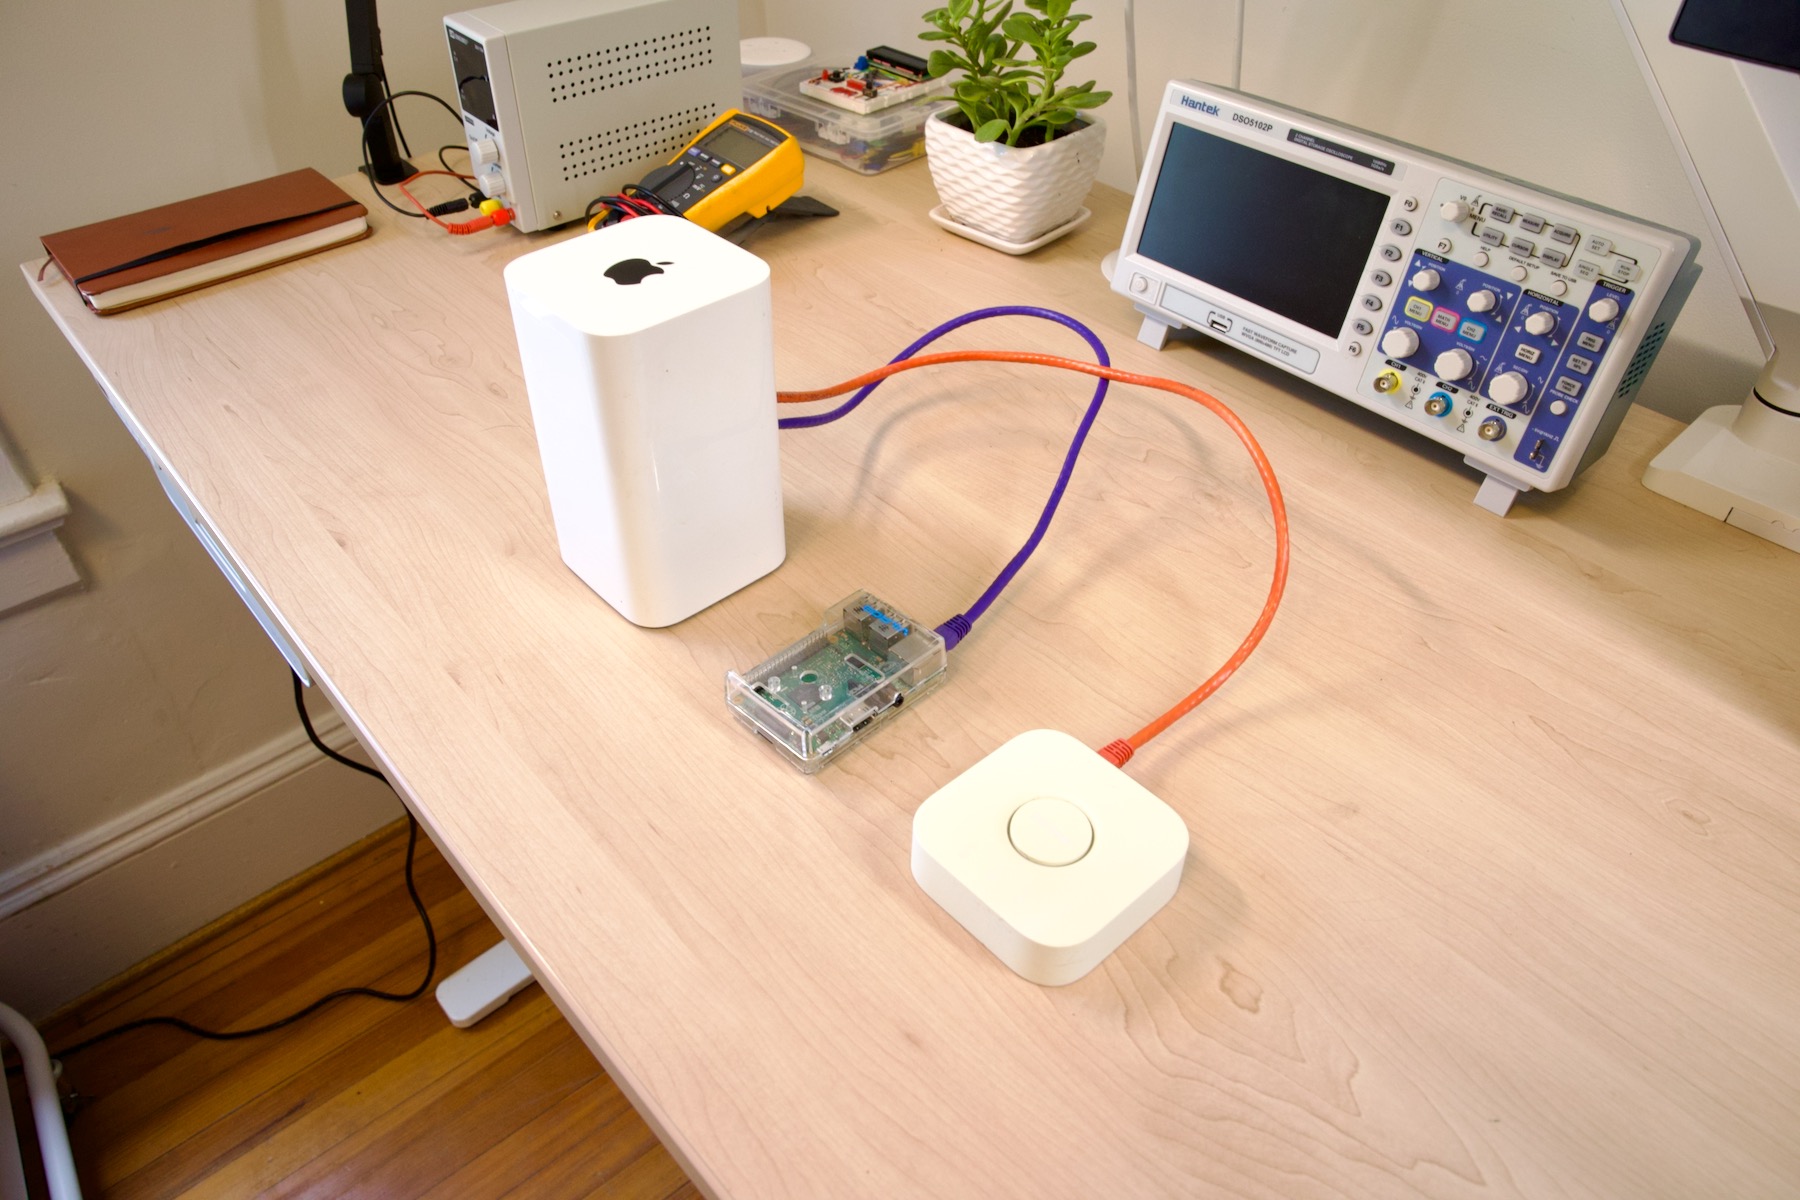
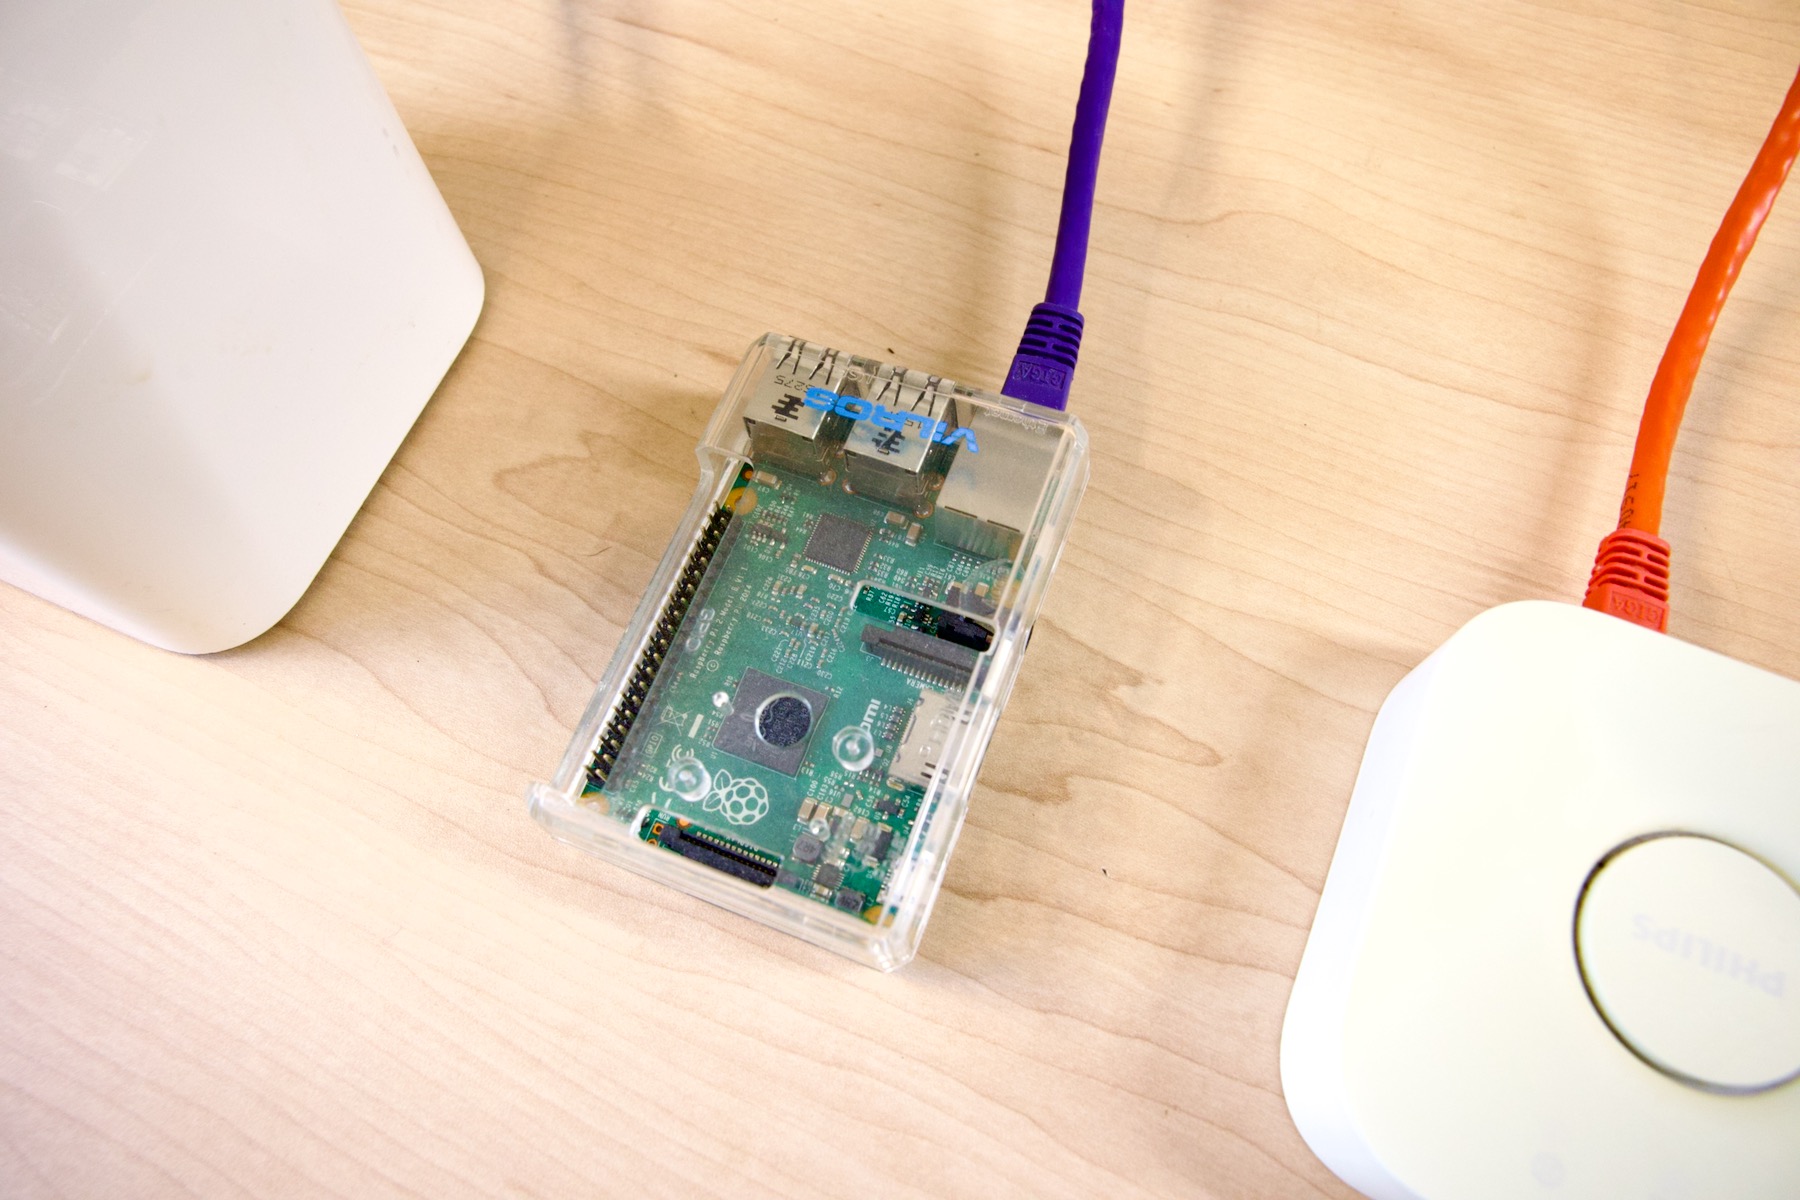
I busted out an old Airport Extreme (#RIP) to use as the router / DHCP server. I set it up to broadcast its own SSID (“NC SIGN”) that I could connect to from my laptop when I wanted to SSH into the Pi.
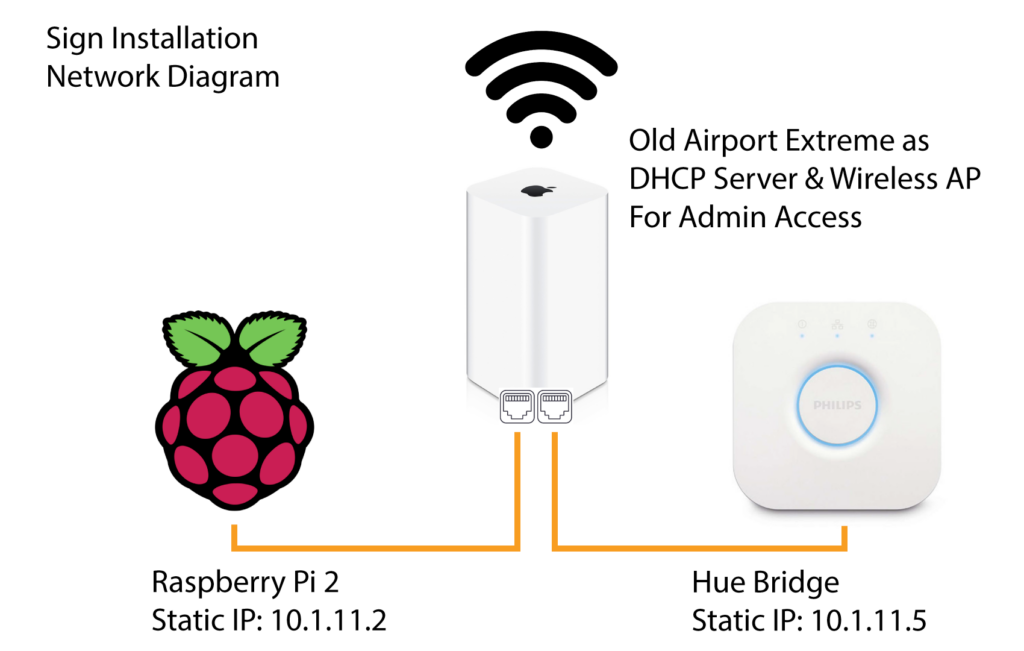
This setup has some advantages:
- Completely portable – It’s not dependent on both having WiFi and having physical access to the WiFi router. All you need is power.
- Higher reliability – The Raspberry Pi and Hue bridge are hardwired to each other through the router. This is helpful because the Raspberry Pi calls the Hue bridge nonstop and we want to prevent connection issues that could interrupt the animations.
- More secure – Air-gapped from the Internet and from other devices.
Disadvantage:
- Requires extra hardware (A router to serve as a DHCP Server and ethernet cables). Note: You don’t need to use a wireless router unless you want to SSH in wirelessly.
If you need to buy a router here’s a cheap on on Amazon.
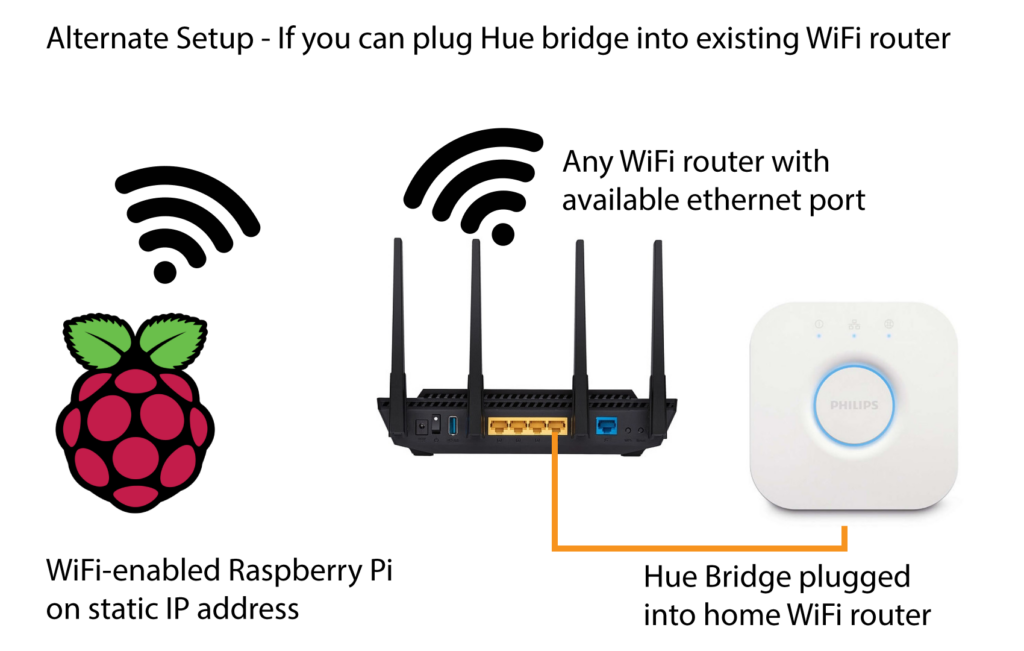
Option 2 – Setup Using Existing WiFi Network
You can get everything up and running without purchasing a router if:
- There is good, reliable WiFi where you want to operate your art installation
- You have physical access to the WiFi router
- There is at least one available ethernet port on the router for plugging in the Hue bridge
- The Hue bulbs are not far away from the location of the Bridge (plugged into the Router)
- You’re using a Raspberry Pi with WiFi (or with a USB WiFi dongle)
⚡️ Flashing the Pi SD Card
You’ll need to flash a microSD card with a headless Raspberry Pi OS and ensure SSH is enabled.
🎨 Programming the LED Art Show
I wrote the code years ago in Ruby. Since the code is pretty straightforward, you can write it in pretty much anything.
View the code on Github:

Note: Be sure to configure your Pi to run the ruby script (display.rb) on boot.
🔎 Code Walk-Through
The animation code turns on and off individual “pixels.” Each pixel represents a Hue bulb. I created a simple pixel layout in the shape of North Carolina and numbered the pixels from left to right.
All animations reference these “pixel” IDs which are different than the UUIDs the bridge assigns to each Hue light.
# Pixel IDs
#
#                     0    1     2    3    4    5    6
#             7    8    9     10   11  (12)  13   14   15
#     16   17   18   19    20    21  (22) (23)  24   25
#                                  26   27   28
#
#
# To make it easier to program the animations we number the
# pixels left to right, descending.
#
# The below Hash maps each numbered pixel id to the UUID of that
# led bulb in the Hue Bridge's REST API
#
# We find the unique Hue id for each bulb by accessing the bridge's
# REST API and playing around with it. There are tutorials out there
# on how to create an API key. Once you have one, go to
# the following URL replacing the bridge IP address & token below
# with your own:
#
# http://10.1.11.2/api/InFhukEjou6kF5igLy9JBQ63OqSeNy9NcridEjRw/lights
#
# This will give you a JSON representation of all the Hue lights
#

module Config

  def bulb(pixel_number)
    bulb_ids = Hash.new
    bulb_ids[0]  = 1
    bulb_ids[1]  = 21
    bulb_ids[2]  = 28

    ... (omitted) ...

    bulb_ids[25] = 14
    bulb_ids[26] = 15
    bulb_ids[27] = 17
    bulb_ids[28] = 4
    bulb_ids[pixel_number]
  end

end
Base Animation class:
require_relative '../config'

module Animations
  class Animation
    include Config

    attr_reader :client

    def initialize(client)
      @client = client
    end

    def lights
      client.lights
    end

    def clear_display
      lights.each do |light|
        light.off!
      end
      sleep 1
    end

    def pixel(id)
      client.light(bulb(id))
    end

    def run
      animate
    end
  end
end
Each animation inherits from Animation:
require 'hue'
require_relative 'animation'
require_relative 'sequences'

module Animations
  class BorderGradient < Animation

    def run
      clear_display

      hue_start = Hue::Light::HUE_RANGE.max
      hue_end = Hue::Light::HUE_RANGE.min

      Sequences::BORDER.each_with_index do |pixel_id, index|
        hue =  (index + 1) * (hue_end - hue_start) / Sequences::BORDER.count + hue_start
        light = pixel(pixel_id)
        light.on!
        light.set_state({:saturation => 255, :hue => hue})
      end

      sleep 5

      Sequences::BORDER.each_with_index do |pixel_id, index|
        light = pixel(pixel_id)
        light.off!
      end

    end
  end
end
View the rest of the code and animations on Github
⏱️ Animation Speed Limitations
It’s not possible to make smooth animations that are “fast.” Zigbee messages from the bridge hop between Hue lights in a mesh setup on their way to their destination. This creates lag that is not constant and that makes the refresh rate pretty slow.
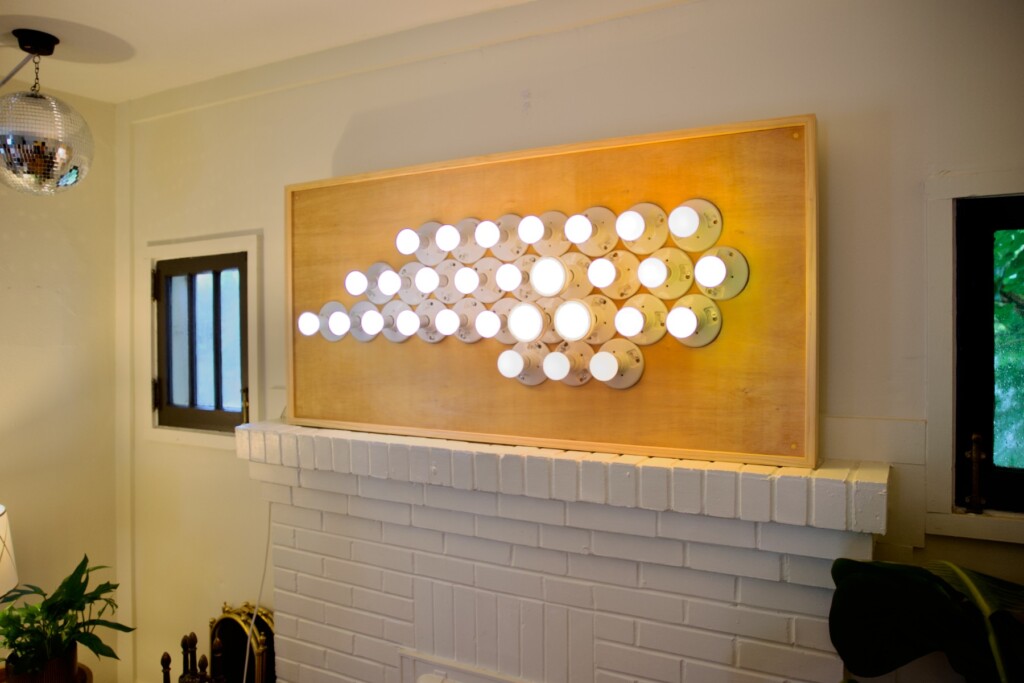
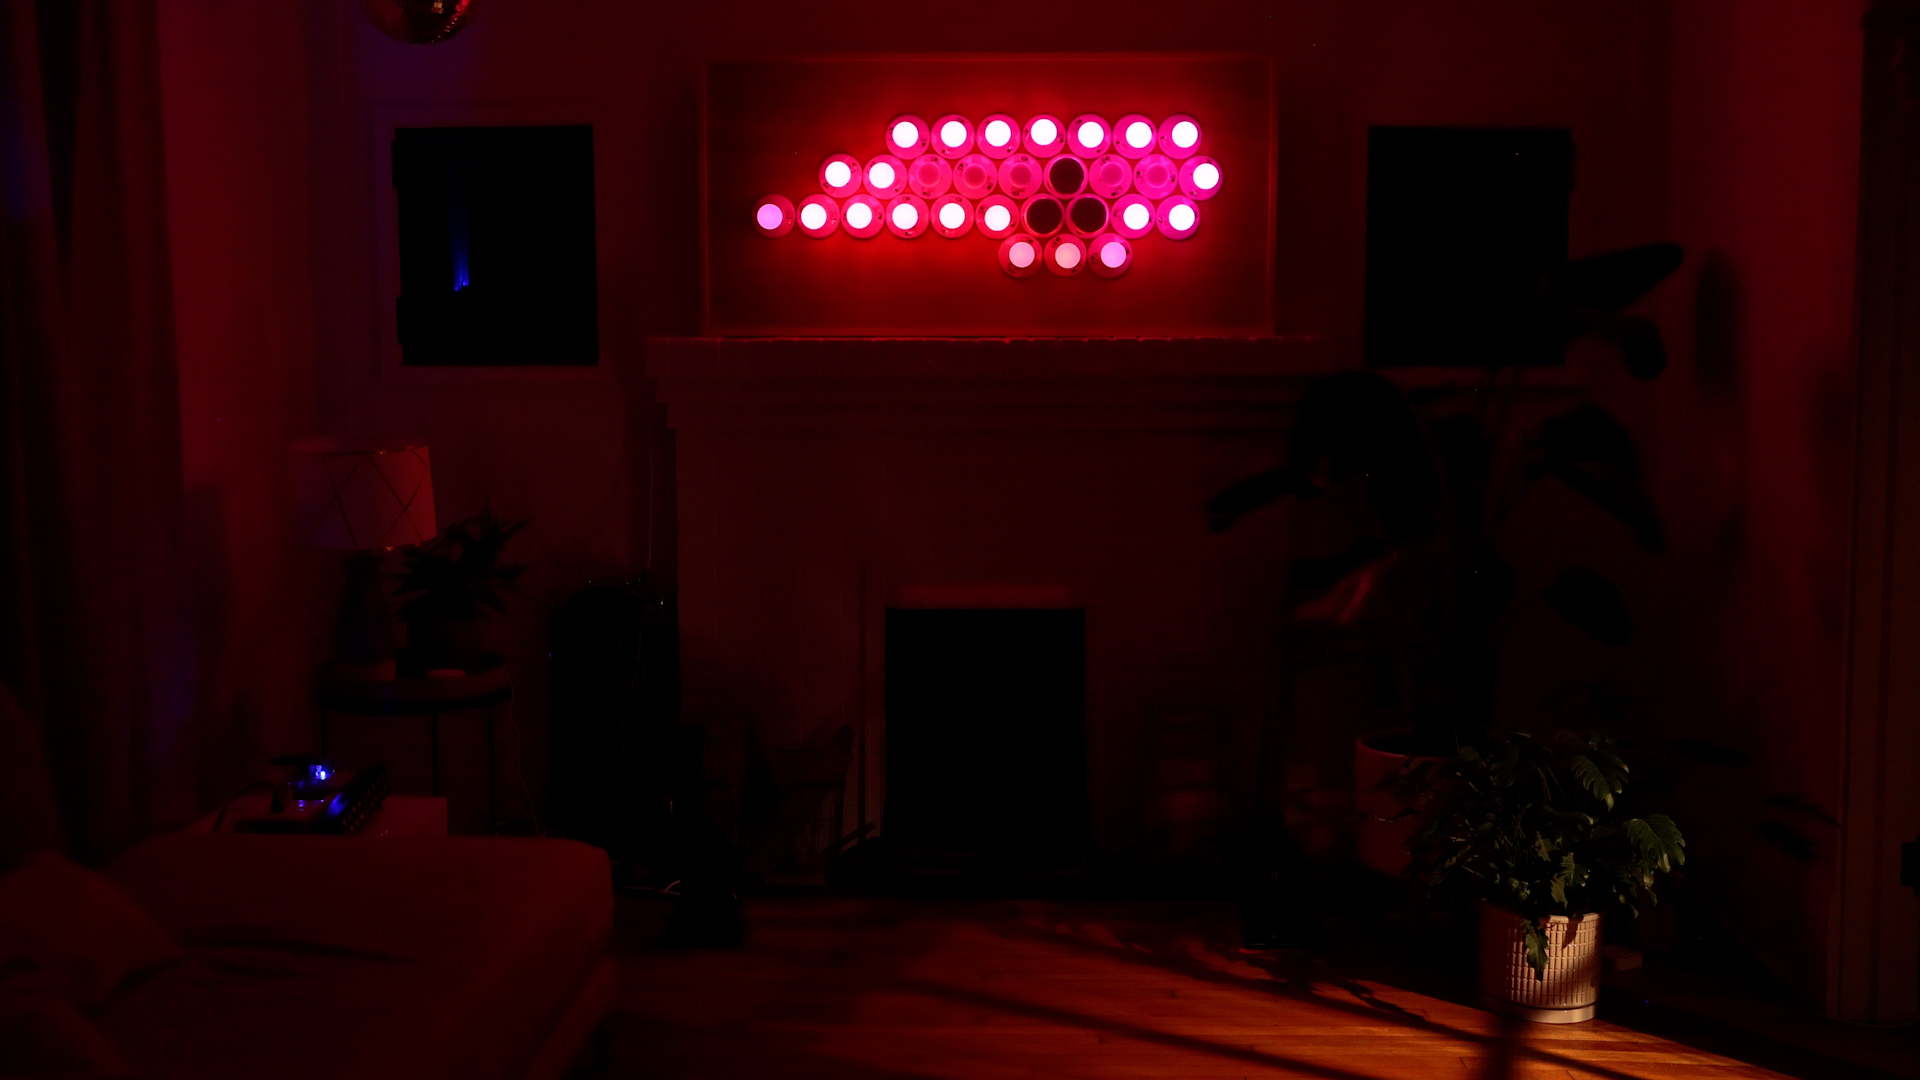
👍🏻 Final Result
And we’re done! 😎
If you have any questions or ideas please let me know in the comments!