This is a step-by-step guide to setting up PyCharm for MicroPython or CircuitPython on the Raspberry Pi Pico and Pico W.
I’ve done several microcontroller projects in PyCharm for the ESP8266 and ESP32 and enjoyed using PyCharm a lot. The PyCharm plugin for MicroPython now supports the Raspberry Pi Pico & Pi Pico W as well, so I decided to kick off my first Pi Pico W project by getting PyCharm set up to work with my Pi Pico W!
When developing on the Pico, you can code in C, C++, or MicroPython. MicroPython is a lightweight implementation of the Python programming language that is optimized for microcontrollers.
PyCharm is a powerful and elegant IDE (Integrated Development Environment) that can help you write better code by increasing your productivity, helping out with debugging, and providing a suite of simple but powerful refactoring tools. It’s especially well-suited for more complex (larger) codebases.
A good IDE, like PyCharm, also makes coding a lot more fun!
All of JetBrains’ products, like PyCharm, WebStorm, and IntelliJ for Java, have a reputation of being very high-quality. Traditionally, cost has been a reason some people have shied away from JetBrains products but price is no longer a barrier. The community edition (which is totally free!) of PyCharm is very powerful and probably has everything you need. Worry not, the free edition of PyCharm can be used in commercial projects.
I’m using a Mac in this tutorial however most of the steps are the same if you’re using Linux or a PC.
Let’s get started!
Table of Contents
- Download PyCharm
- Installing MicroPython on the Pi Pico / Pico W
- Creating a MicroPython Project in PyCharm
- Installing the PyCharm MicroPython Plugin
- Configuring the Plugin
- Creating Your First Python File
- Installing the Required Packages
- Adding the Code
- Flashing main.py to the Board
- Flashing Multiple Python Files at Once
- Removing Files From the Pico
- Accessing the REPL
- Error Flashing After Using the REPL?
Download PyCharm
Before we begin, download and install Pycharm.
Installing MicroPython on the Pi Pico / Pico W
To install MicroPython on your Pi Pico, you’ll need to download a UF2 file for the correct device:
Then, and while holding down the BOOTSEL button on the Pico board, plug it into a free USB port and release the button. It will mount like a USB thumb drive.
Drag the .uf2 file that you downloaded onto the mounted drive and the Pi Pico will disconnect and reboot.
You’re ready to run MicroPython code on your Pico!
Creating a MicroPython Project in PyCharm
Before we begin, download and install PyCharm.
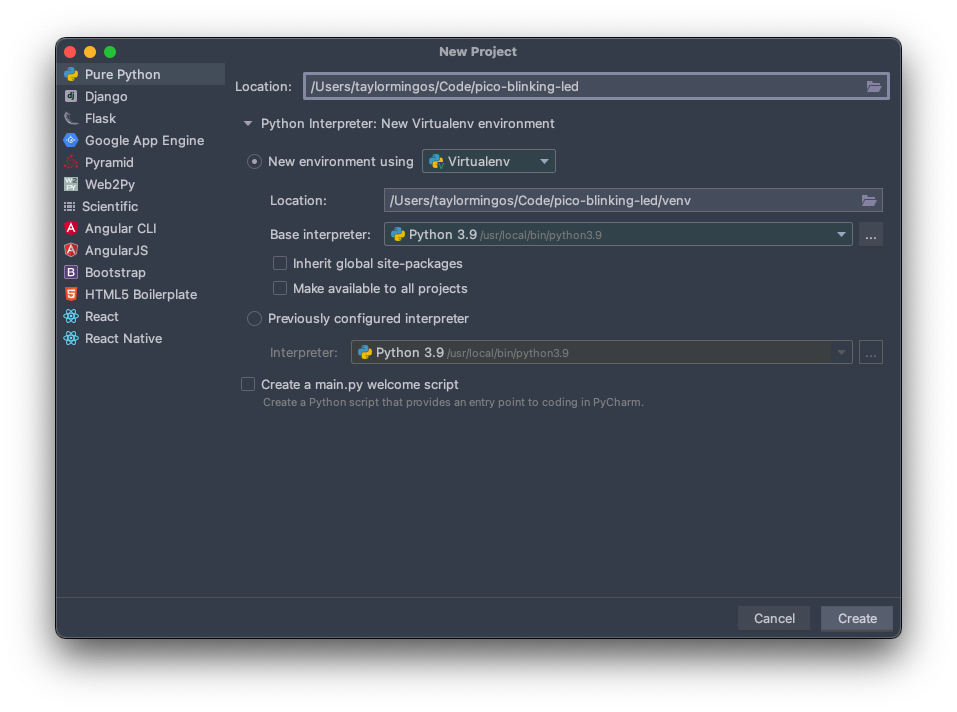
Next, create a new Python project and name it something like pico-blinking-led:
Installing the PyCharm MicroPython Plugin
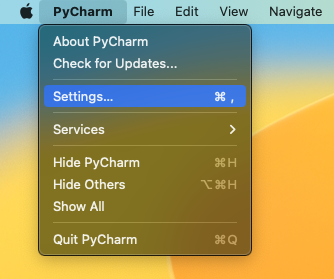
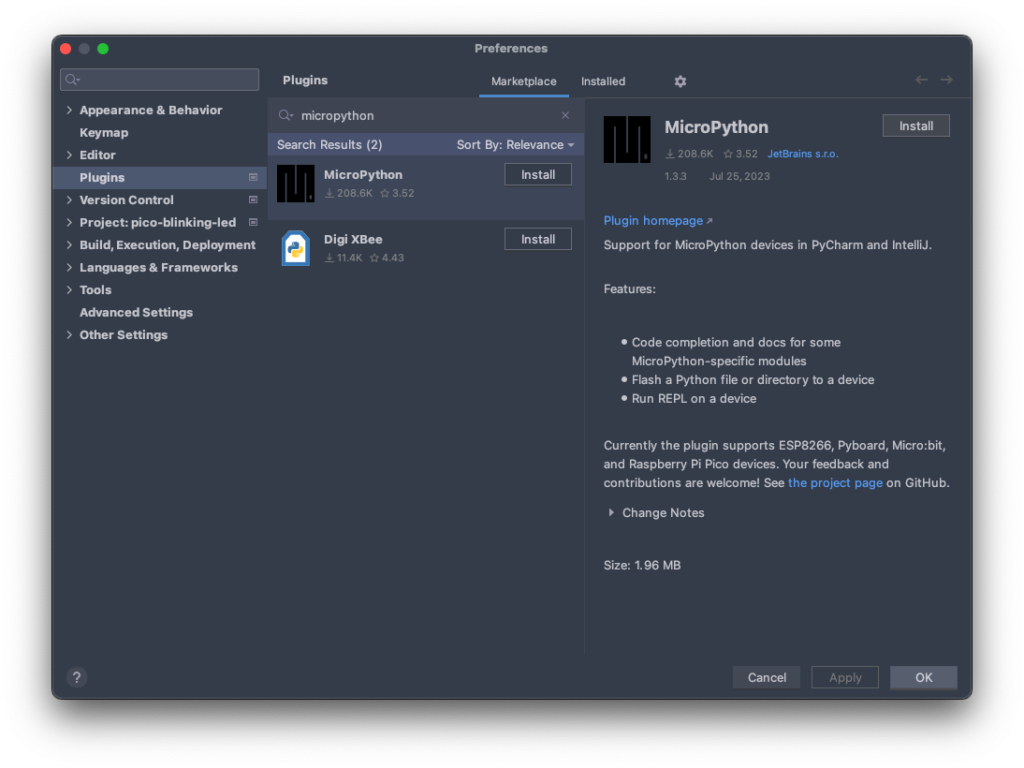
First, open PyCharm’s Settings:
Select Plugins and find the MicroPython plugin in the search box under Marketplace:
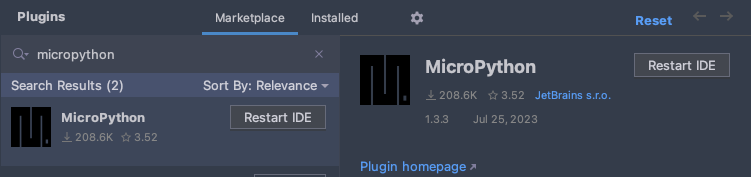
After installing, hit Restart IDE
Configuring the Plugin
Open Pycharm’s settings again and under Languages & Frameworks, click on MicroPython:
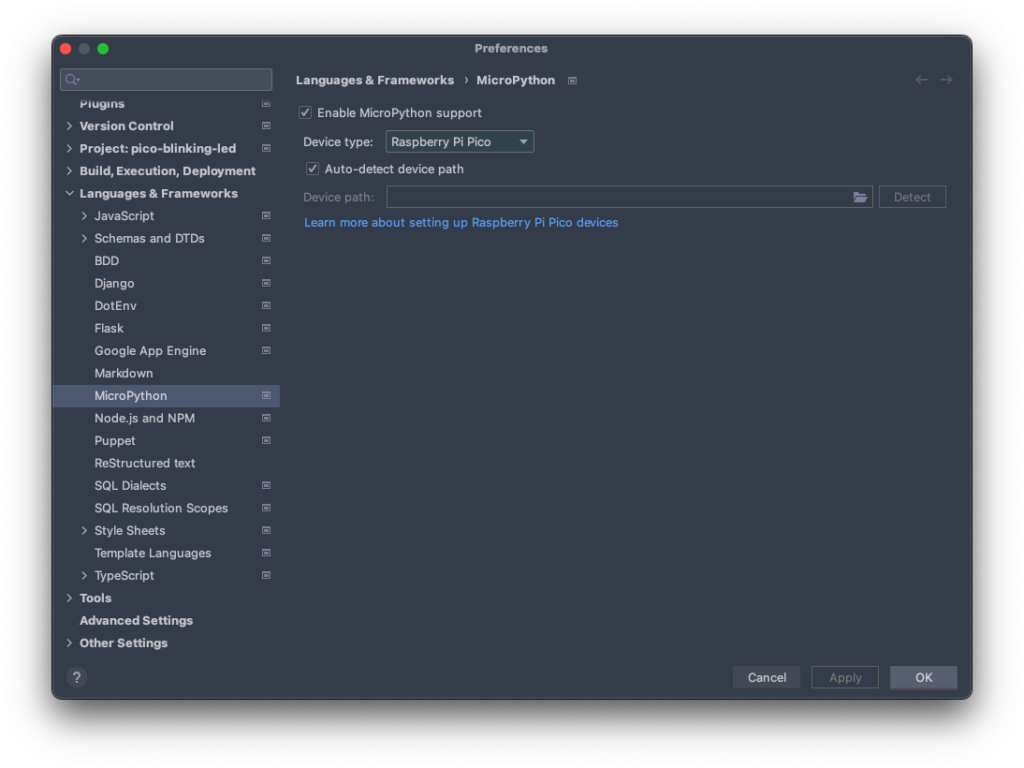
In the plugin configuration, select “Enable MicroPython support. Make sure “Device type” is set to “Raspberry Pi Pico” and select the checkbox to enable “Auto-detect device path”
Creating Your First Python File
Right-click with the mouse (or hold down control and click) the name of the project in the left Project pane and select New -> Python File
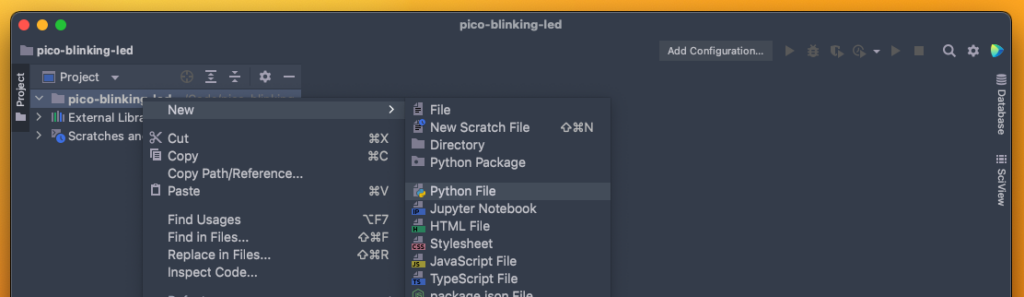
We’ll name the file main.py.
Installing the Required Packages
At this point, the below “Packages required for Raspberry Pi Pico support not found…” message should be displaying at the top of the editor:
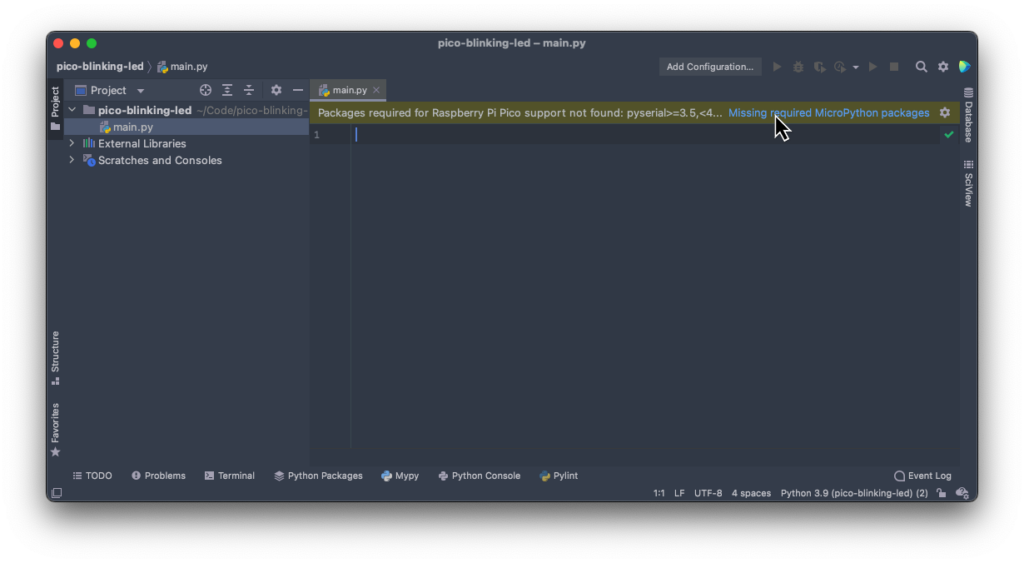
Click the link to install the missing and required MicroPython packages.
Adding the Code
We’ll add some basic code to flash the onboard LED on and off:
from machine import Pin
import utime

led = Pin("LED", Pin.OUT)
while True:
    led.toggle()
    utime.sleep(1)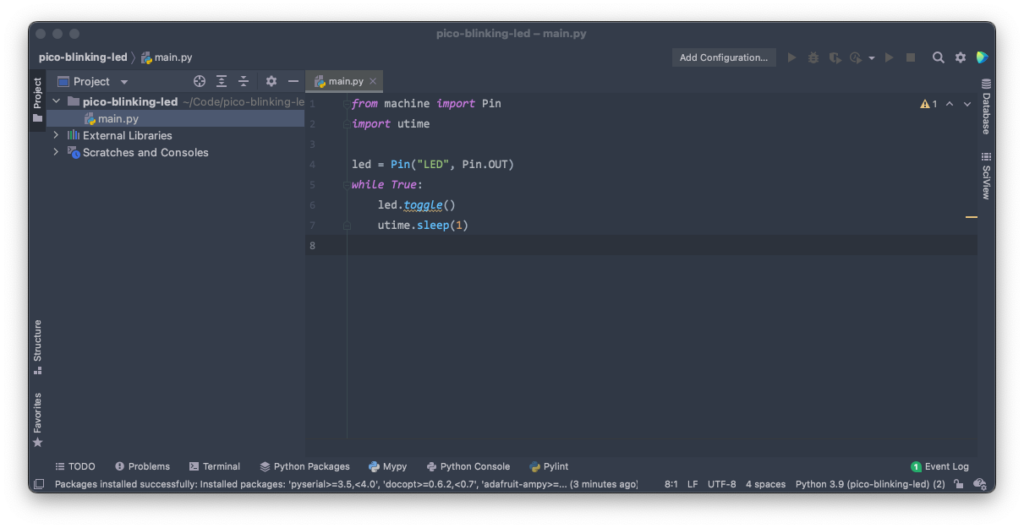
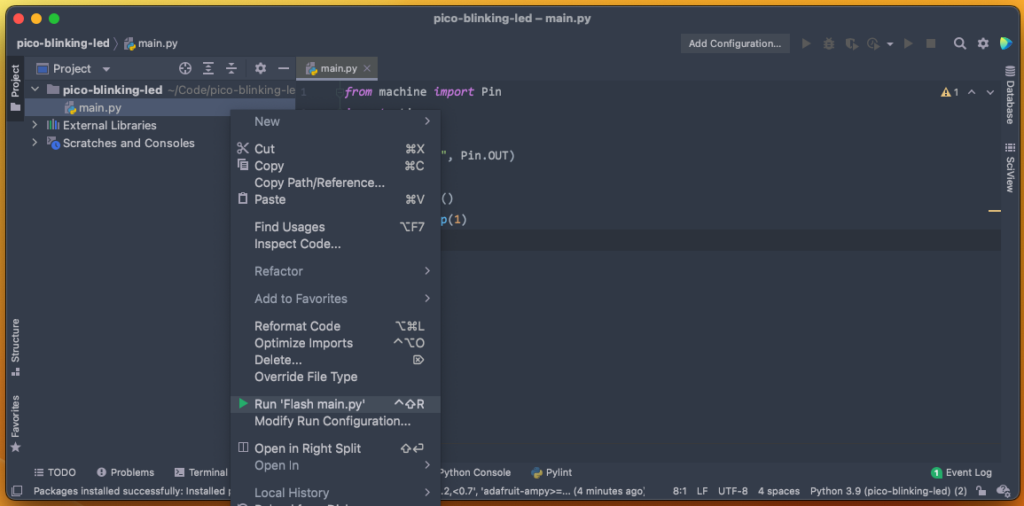
Flashing main.py to the Board
Right-click (mouse) or hold control and click on main.py in the left Project pane.
Select “Run ‘Flash main.py'”
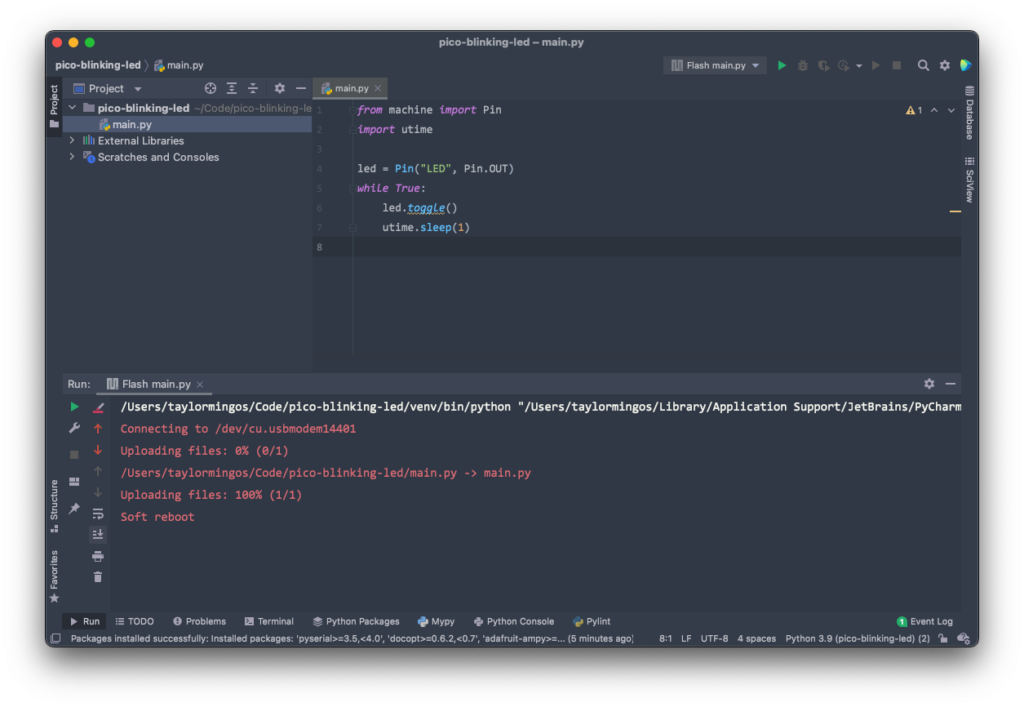
Progress will be shown in the bottom pane and after flashing you should see the device reboot:
Flashing Multiple Python Files at Once
As your projects get bigger you’ll have more than one file to flash to the device.
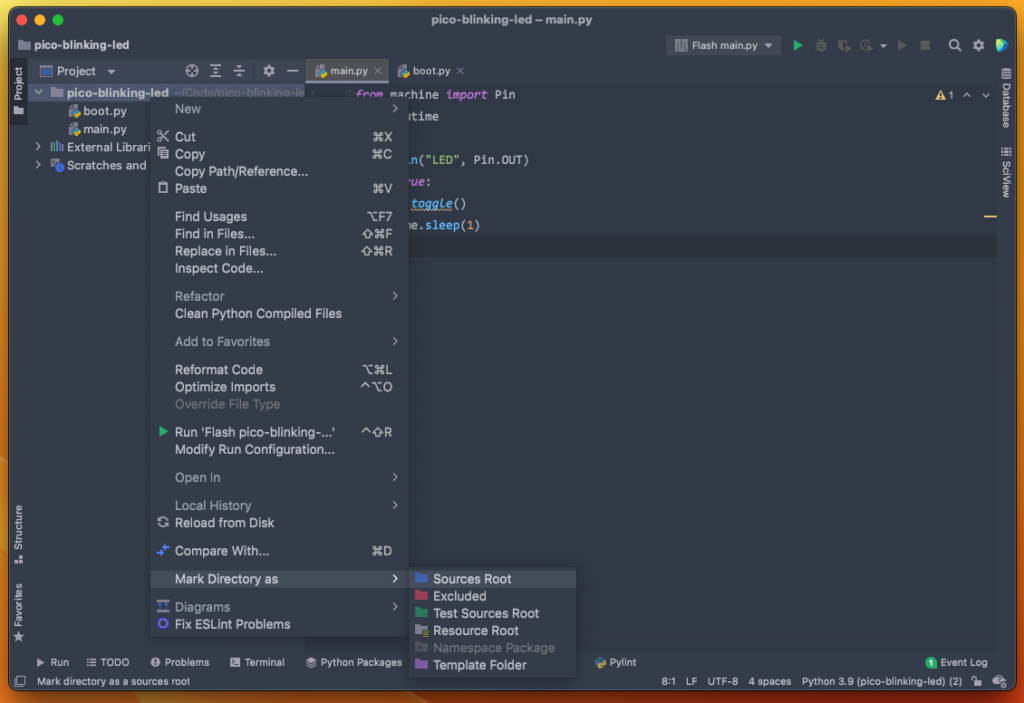
To flash multiple Python files at once, select the root folder of the project in the Project pane and go to Mark Directory As -> Sources Root:
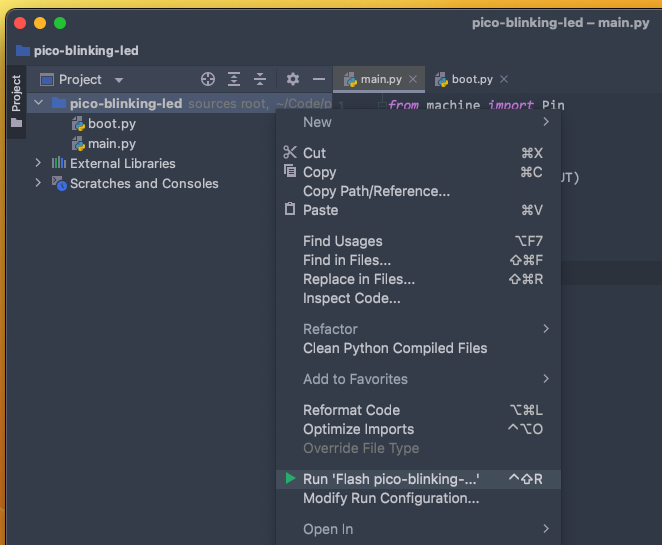
Next, right-click (mouse) or hold control & click on the root folder and select “Run…”
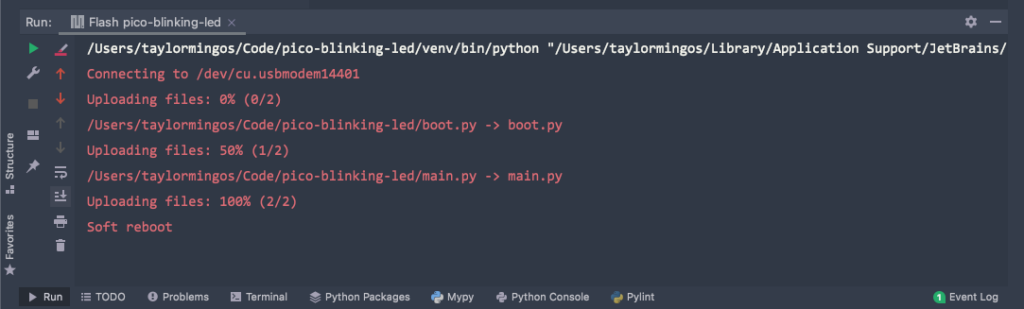
You should see all the files being written to the Pico:
Going forward, you can simply click the green arrow in the top nav to flash all the files:
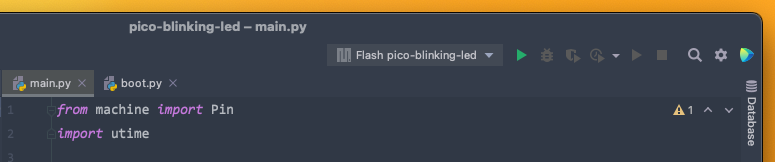
This is called a run configuration.
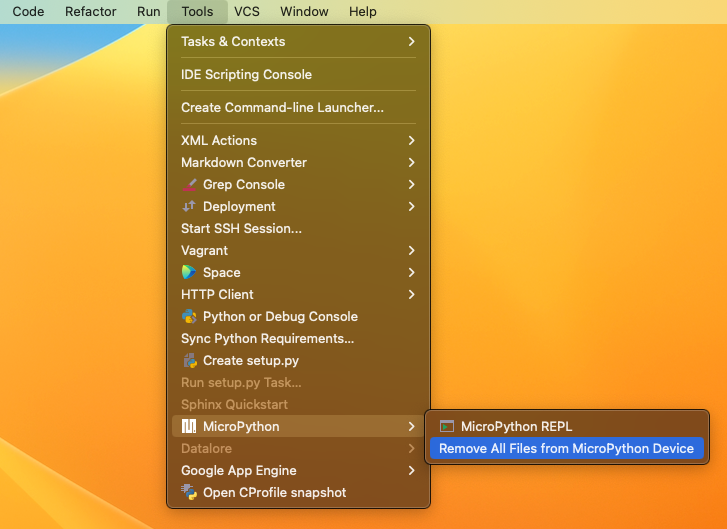
Removing Files From the Pico
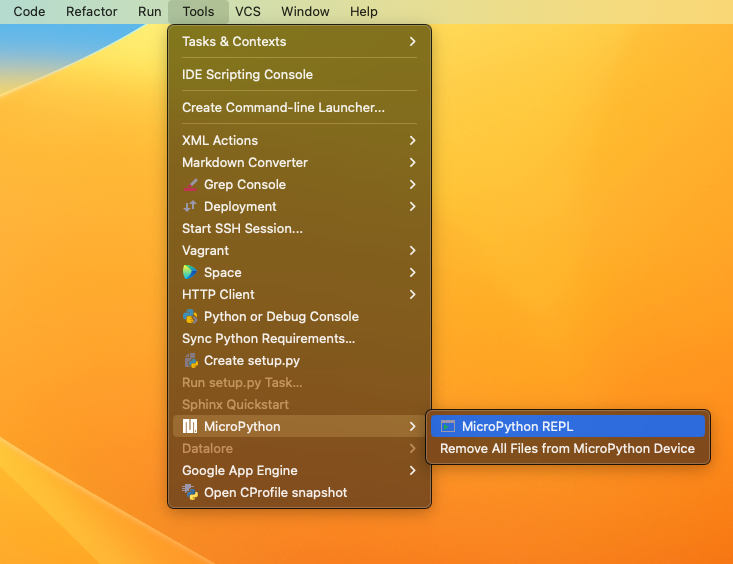
Accessing the REPL
A read–eval–print loop (REPL) is an interface that allows you to run Python commands manually on the device. This is helpful when programming to test out code or debug.
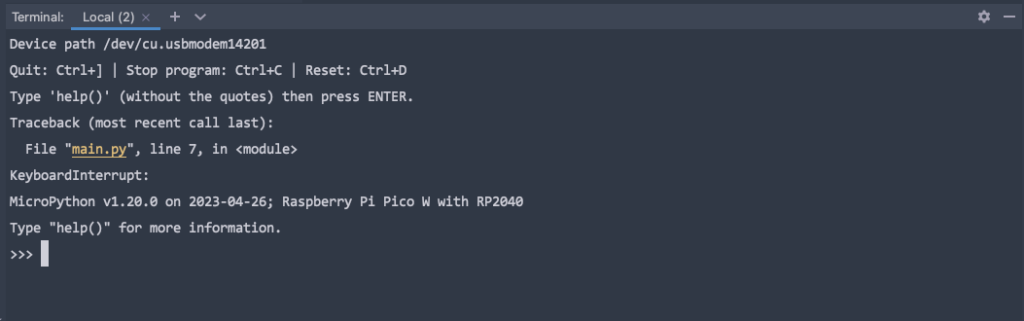
You can now enter and run Python code line-by-line on the device itself.
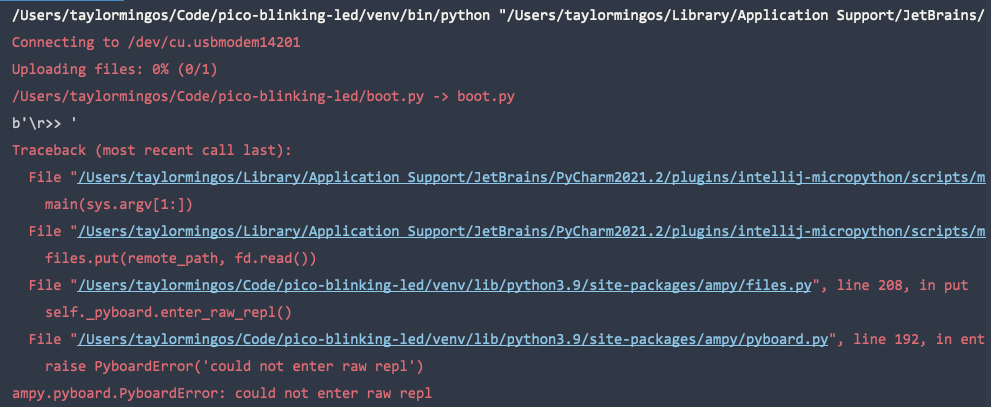
Error Flashing After Using the REPL?
Be sure to use control + ] to exit the REPL when done or else you won’t be able to flash files to the Pico. You can either exit the REPL before flashing or unplug and plug back in your Pico.